What Is Tongue and Groove Cladding?

This construction method utilises specially designed timber boards. Each board features a protruding edge, the tongue, and a corresponding slot, the groove. These elements slot together perfectly, creating a seamless connection.
This interlocking system is a premium choice for building projects across the United Kingdom. It is particularly popular for garden structures and interior finishing work. The design offers superior structural integrity compared to traditional methods.
Builders and homeowners value this technique for its durability and attractive finish. It creates excellent weather-tight seals, protecting buildings from the elements. This guide explores the technical specifications and practical applications.
Readers will discover the advantages for various projects. This includes garden sheds, summer houses, and exterior façades. The information suits DIY enthusiasts and professional contractors alike.
Inhaltsverzeichnis
Key Takeaways
- This cladding system uses interlocking timber boards for a strong, seamless finish.
- It provides a durable and weather-resistant solution for both interior and exterior projects.
- The method is a popular choice for garden buildings and residential properties in the UK.
- It offers a clean, attractive appearance with minimal visible fasteners.
- Understanding the installation process is key to achieving optimal results.
- This type of timber construction requires specific maintenance to ensure longevity.
Overview of Tongue and Groove Cladding
The external skin of structures often employs specialised covering materials. These protective layers serve multiple essential functions in construction projects throughout the United Kingdom.
Definition and Key Concepts
Cladding acts as a building’s protective shield against weather elements. It provides improved insulation and enhances visual appeal. The system creates a durable external or internal surface.
This particular joinery method features precision-machined edges. Each timber board contains a protruding ridge and corresponding recessed channel. These complementary elements create mechanical interlocking between adjacent units.
The design prevents moisture penetration and draught infiltration. It forms uniform surfaces without visible gaps. This profile system represents advanced timber engineering.
Historical and Modern Applications
Traditional carpentry techniques inspired this construction approach. Historical methods have evolved through modern manufacturing precision. Contemporary products maintain classic joinery principles.
Today’s applications span residential, commercial and agricultural sectors. The system adapts to various architectural styles while retaining fundamental advantages. Its strength and weather resistance remain consistently valuable.
Versatility extends to both new builds and renovation projects. Garden buildings, residential interiors and commercial façades all benefit. Sustainable building practices increasingly favour this renewable timber solution.
What Is Tongue and Groove Cladding?
Each timber unit contains complementary edges that create seamless integration. This joinery system transforms separate components into unified surfaces.
Design Features and Joinery
The protruding ridge, precisely machined along one board edge, ensures tight fitting. Corresponding recessed channels accept these ridges with controlled friction.

Opposing edges feature these complementary profiles. This configuration enables continuous mechanical connection across entire surfaces.
| Installation Method | Profile Orientation | Common Applications | Key Advantage |
|---|---|---|---|
| Vertical Stacking | Top and Bottom Edges | Garden Sheds, Outbuildings | Weather Resistance |
| Horizontal Connection | Left and Right Edges | Interior Walls, Feature Surfaces | Visual Continuity |
| Diagonal Arrangement | Angled Profiles | Specialist Architectural Projects | Design Flexibility |
How It Works in Construction
Vertical installation begins with the bottom panel. Each subsequent unit’s groove slots onto the tongue below.
The self-aligning nature of this system reduces installation errors while enhancing structural performance.
This stacking method creates load-distributing walls. Horizontal applications follow similar interlocking principles side-by-side.
The mechanical connection eliminates gaps between components. This provides superior weather protection and thermal efficiency.
Applications and Design Ideas
The versatility of this interlocking system extends far beyond basic construction. It offers a wealth of creative possibilities for enhancing both the function and aesthetics of various structures.

This approach is a favourite for garden sheds and summer houses. Its tight seal provides excellent protection for tools and furniture. The robust construction ensures these buildings stand up to the British weather.
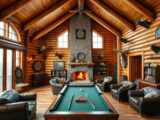
Inside the home, this method creates stunning feature walls and ceilings. It adds warmth and character to any room. The natural timber brings an organic texture that synthetic materials cannot match.
For a modern look, consider mixing horizontal and vertical board orientations. Using contrasting wood species can create striking accent features. This design technique works beautifully for both interior and exterior applications.
These ideas demonstrate how this type of construction can transform a garden building or home interior. It combines durability with exceptional visual appeal.
Advantages and Weather Resistance
Superior performance in challenging weather conditions makes this method a preferred choice for UK building projects. The system’s design delivers multiple benefits that ensure long-term reliability.
Durability and Insulation Benefits
The interlocking joints create a unified structural assembly. This distributes loads effectively across the entire surface.
Gap-free construction provides excellent thermal performance. It minimises heat loss and maintains comfortable interior temperatures throughout the year.

| Performance Aspect | Benefit Level | Key Advantage | Longevity Impact |
|---|---|---|---|
| Structural Strength | Excellent | Load distribution | Extended service life |
| Thermal Insulation | High | Energy efficiency | Consistent comfort |
| Impact Resistance | Very Good | Damage prevention | Reduced maintenance |
| Dimensional Stability | Superior | Minimal warping | Sustained quality |
Waterproofing and Rot Resistance
Tight-fitting joints prevent water penetration effectively. The overlapping design sheds moisture away from the structure.
This water-resistant feature significantly reduces rot risk. Properly maintained installations maintain their integrity for decades.
The system’s natural expansion capabilities accommodate humidity changes. This prevents moisture accumulation that could compromise wood quality over time.
Comparing Tongue and Groove to Other Cladding Types
Selecting the right timber profile requires understanding key differences between available systems. Each option offers distinct advantages for various applications and budgets.

Overlap Versus Tongue and Groove
Overlap systems use rough-cut 9mm boards that simply overlap each other. This budget-friendly option provides basic protection but lacks refinement.
The interlocking method creates a superior sealed surface. Its precision-machined joints prevent gaps that can develop in overlap constructions.
- Cost: Overlap offers entry-level pricing, while the interlocking system represents premium investment
- Appearance: Rough-sawn overlap creates rustic look versus refined flush finish
- Security: Overlap’s exposed edges create vulnerability compared to smooth, inaccessible surfaces
Shiplap and V-Groove Distinctions
Shiplap is technically a variant of the interlocking joint system. It features a rebated edge profile with an extended lip.
This design enhances water runoff with curved upper edges. The V-groove profile creates distinctive shadow lines between boards.
While shiplap offers marginal weather protection improvements, standard profiles provide adequate performance at lower cost. The choice depends on specific project requirements and aesthetic preferences.
Tips for Installation and Maintenance
Proper installation and care are vital for the long-term performance of any timber structure. Following best practices ensures the material’s durability and aesthetic appeal are preserved for many years.

Starting with a solid foundation is crucial. A well-prepared framework with adequate ventilation prevents moisture build-up behind the panels.
Installation Best Practices
Correct sequencing is essential for a successful build. For vertical applications, begin at the bottom. Ensure the first board is perfectly level.
Each subsequent board slots into place. Concealed nailing through the tongue provides a clean finish. Expansion gaps at corners and openings are vital.
These gaps allow the timber to move naturally with changes in humidity. This prevents warping and ensures a stable structure.
Maintenance and Treatment Options
Applying a protective treatment soon after installation safeguards the wood. Pressure-treated timber offers enhanced resistance to decay and pests.
Regular maintenance extends the life of the building. A quality stain or preservative should be reapplied every two to three years.
This routine protects against weathering and maintains the wood’s appearance. It is a small investment that protects your budget over time.
Professional Assistance Versus DIY
Many projects are suitable for enthusiastic DIYers. The interlocking profile simplifies assembly, potentially saving money.
However, complex designs or bespoke features may require professional skill. Contractors bring expertise that guarantees the highest standards.
They can handle intricate details like secret fixings and custom trims. Weighing the project’s scale against your own skills ensures the best outcome.
| Aspect | DIY Approach | Professional Installation | Key Consideration |
|---|---|---|---|
| Cost | Lower initial outlay | Higher upfront cost | Long-term value |
| Time | Project-dependent | Efficient completion | Personal schedule |
| Skill Level | Basic to intermediate | Expert precision | Complexity of build |
| Result Quality | Varies with experience | Consistently high | Desired finish |
Conclusion
The enduring appeal of precision-machined timber profiles lies in their performance benefits. This joinery system creates weather-resistant surfaces suitable for diverse applications across UK properties.
Superior insulation and structural strength position it as a premium choice. The versatility extends from garden sheds to commercial façades, offering both functional and aesthetic value.
Proper installation and maintenance ensure decades of reliable service. Investing appropriate time and money in these aspects delivers long-term returns.
A wide range of options exists within this category. Different profiles like shiplap offer varied appearances to suit specific projects.
This construction method justifies its initial cost through reduced lifetime expenses. It remains a top selection for quality-conscious builders seeking lasting results.
FAQ
How does tongue and groove cladding differ from standard overlap panels?
The primary distinction lies in the joinery. Overlap panels simply lay one over the other, whereas tongue and groove boards feature an interlocking system. This creates a much tighter, more robust seal that offers superior weather resistance and a cleaner, more finished appearance for sheds and exterior walls.
Can this type of timber cladding be used for interior walls?
A> Absolutely. While renowned for its exterior durability, this cladding is equally popular indoors. It adds significant character and warmth to feature walls, ceilings, and even built-in furniture. The tight fit between boards provides excellent surface continuity, enhancing a room’s acoustic insulation.
What are the main advantages of choosing tongue and groove over shiplap?
Both profiles offer good performance, but they create different visual effects. Shiplap has a distinct, recognisable shadow gap between each board. Tongue and groove provides a flatter, smoother surface as the boards fit together more seamlessly. The choice often comes down to personal preference for the final design aesthetic.
Is professional installation recommended for this cladding?
For large projects or complex buildings, hiring a professional is advisable to ensure a perfect finish and long-term durability. However, for smaller garden projects like sheds, a competent DIY enthusiast can achieve excellent results by carefully following installation best practices, potentially saving money.
How can I maintain the quality and appearance of my timber cladding?
Regular maintenance is key to longevity. Applying a high-quality protective finish, such as a stain, paint, or preservative, upon installation and recoating as recommended by the manufacturer will protect the wood from moisture and UV damage. This simple upkeep preserves its rot resistance and visual appeal for many years.