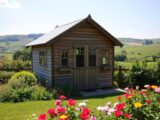
Metal Shed Installation: Ground Placement Tips

Setting up a metal garden shed should be simple, secure, and built to last. This guide answers the question many homeowners ask: can i put a metal shed directly on the ground. It also outlines how to choose a robust metal shed base UK users trust, with clear steps for shed ground preparation that suit British weather.
We draw on guidance from YardMaster, Absco Sheds, and Asgard, along with recognised UK practices for concrete and paving. You will learn the best base for metal shed projects in typical UK gardens, how to prevent rust metal shed issues through moisture control, and the shed anchoring methods UK installers use to resist wind uplift.
From clearing and levelling to membranes, drainage falls, and correct fixings, this introduction sets the scene. Follow on to compare concrete slabs, paving slabs, timber frames, and gravel pads with anchors, and to plan a square, level, and durable metal garden shed installation.
Inhaltsverzeichnis
Key Takeaways
- Do not place a metal shed straight on soil; choose a stable metal shed base UK homeowners can maintain.
- Plan shed ground preparation to manage water run-off and frost, protecting panels and fasteners.
- Select the best base for metal shed longevity: concrete, paving slabs, timber frame, or a gravel pad with anchors.
- Use damp-proof layers and separate metal from the ground to prevent rust metal shed problems.
- Apply shed anchoring methods UK suppliers recommend to reduce uplift risk in exposed locations.
- Check manufacturers’ guidance from YardMaster, Absco Sheds, and Asgard for compatible fixings and bases.
- Keep the site level and square to ensure smooth assembly and long-term structural stability.
Understanding Ground Placement for Metal Sheds
Ground placement sets the tone for performance, safety, and upkeep. Good shed ground conditions help the frame stay square, doors run true, and panels remain tight against the weather. A well-chosen base also supports drainage and limits the risk of rust.
Why ground preparation matters for longevity
A flat, compacted base spreads weight evenly so the structure does not rack or twist. This protects hinges, locks, and glazing from stress.
In the long run, careful setup adds resilience to shed lifespan UK weather by controlling water and movement underfoot. It also gives room for anchors to grip and for edges to stay clear of splashback.
Moisture, corrosion, and structural stability considerations
Water is the chief threat to coated steel. Standing moisture speeds rust at cut edges and fixings, so corrosion prevention shed measures begin at ground level. A free-draining layer and damp proofing shed base stop capillary rise from wet soils and reduce condensation under the floor.
Stability relies on dense, well-compacted layers that resist differential settlement. Where loads are uneven, panels can bow and seals may open, letting in wind-driven rain.
UK climate factors: rainfall, frost, and soil movement
Frequent rain and sudden downpours in the UK demand reliable surface falls and run-off paths. In colder snaps, soil movement frost heave can lift corners if water sits beneath the base. Granular sub-bases help shed water and blunt that force.
Clay patches common in England shrink and swell with seasons, nudging supports out of level. Selecting a graded sub-base such as MOT Type 1 and compacting in layers steadies shed ground conditions and supports corrosion prevention shed in coastal spray zones, while a damp proofing shed base keeps the steel dry to sustain shed lifespan UK weather.
| Factor | Risk to Metal Sheds | Recommended Response | Benefit |
|---|---|---|---|
| Heavy rainfall | Ponding, splashback, interior leaks | Establish falls, fit gutters from brands like Marley, use free-draining sub-base | Controls moisture and supports corrosion prevention shed |
| Frost and freeze–thaw | Soil movement frost heave lifting corners | Granular layers, firm compaction, avoid waterlogged spots | Maintains level and door alignment |
| Clay shrink–swell | Differential settlement and racking | MOT Type 1 sub-base, staged compaction with a Wacker Neuson plate | Improves structural stability over seasons |
| Coastal exposure | Salt-accelerated corrosion | Quality galvanised panels, intact paint systems from brands like Dulux Trade | Extends shed lifespan UK weather |
| Persistent ground damp | Capillary wetting of base frame | Damp proofing shed base, airflow gap, geotextile separation | Keeps steel dry and limits rust at fixings |
Site Selection and Planning for UK Gardens
A smart shed location UK garden choice starts with the ground itself. Aim for a gentle fall away from the base, roughly 1:60 to 1:80, so surface water does not linger. Sunlight helps dry walls and paths, yet excess heat can cycle condensation; balance shade and light, and design for cross-flow air.

Assessing drainage, access, and sunlight
Begin with a thorough drainage assessment. Avoid hollows that pond after rain, test soil percolation, and, in wetter plots, plan French drains or a gravel trench to move water away from the slab and skirting.
Map a clear shed access path for barrows, pallet trucks, and maintenance tools. Allow turning room for large panels and a safe staging area during delivery.
Favour a spot with morning sun to dry dew, while preserving airflow to limit damp. If the area bakes in summer, add shade planting or reflective finishes, paired with effective ventilation for metal sheds.
Proximity to boundaries, trees, and utilities
Respect boundary rules shed compliance. In England and Wales, outbuildings within 2 m of a boundary are typically limited to 2.5 m high under Permitted Development; always verify with the Planning Portal or your council. Scotland and Northern Ireland may differ.
Consider tree root impact shed base performance. Keep distance from thirsty species such as willow and poplar to reduce root heave. Avoid constant drip from canopies that can overwhelm gullies and clog channels.
Stay clear of underground services. Contact LinesearchbeforeUdig before breaking ground to avoid cables, gas lines, or drains, and mark routes so future works remain safe.
Allowances for doors, ventilation, and future maintenance
Plan door swing, ramp gradient, and eaves clearance early. Leave 300–600 mm around sides for anchor fixing, painting, gutter care, and safe inspection, keeping the shed access path unobstructed year-round.
Site louvres and grilles to enable throughflow without blockage from fences or walls. Prioritise ventilation for metal sheds to curb corrosion and control condensation, while keeping intake and exhaust paths free.
Build in space for upgrades—a power spur, shelving, or a water butt—and ensure your chosen shed location UK garden leaves room to revise the base if drainage assessment later suggests extra soakaways or channels.
can i put a metal shed directly on the ground?
A metal shed on soil seems quick, but UK conditions make it risky. Rain and frost drive moisture into base rails, leading to ground contact rust and warped panels. Doors can stick, and anchors lose grip as the ground settles.
Manufacturers such as YardMaster, Asgard, and Biohort set a clear shed base requirement UK buyers should note. They call for a level, firm platform that drains well and accepts fixings. This answers the common question: do I need a base for metal shed? Yes—if you want reliable alignment and safe anchoring.
Preferred shed floor options metal owners use include a poured concrete slab, well-laid paving slabs, or a raised timber or steel frame. Each isolates the structure from wet soil, reduces condensation, and gives a true surface for assembly.
If you must place a unit without a full slab, reduce risk by stripping turf, compacting a granular layer, adding a geotextile and a damp-proof layer, then setting the shed on pressure-treated bearers with mechanical anchors. This still leaves more exposure to ground contact rust than a proper base.
Before purchase, check the shed base requirement UK guidance in the product manual and plan drainage from the start. That way, shed floor options metal builders choose can cope with weather, keep fixings dry, and stop a metal shed on soil from shifting or corroding.

Ground Preparation Essentials
A durable metal shed starts with a stable, dry platform. Effective site clearance shed work, accurate levelling shed site, and a controlled fall for drainage shed all reduce movement, damp, and future repairs. The steps below set up a clean, compacted base ready for concrete, slabs, timber, or gravel.

Clearing vegetation and organic matter
Strip and remove turf for shed base along with 75–100 mm of organic topsoil to reach firm subgrade. Organic matter breaks down and creates voids that can lead to settlement. Rake out stones and cut back roots that might heave the base later.
For persistent weeds such as horsetail, use a suitable systemic herbicide and follow COSHH guidance and manufacturer instructions from brands like Roundup Pro or Gallup. Allow full die-off before excavation continues to keep the area clean for the weed membrane and sub-base.
Levelling the area and establishing fall for drainage
Mark out the footprint with string lines and stakes, then check diagonals for squareness. Trim high spots, fill low spots, and compact the subgrade. A vibrating plate compactor helps create a dense surface that resists creep.
Set a gentle fall for drainage shed of about 1:60 to 1:80 away from the shed. If the garden is flat, form a shallow perimeter swale or channel to steer runoff clear of the walls and base fixings.
Laying a geotextile membrane to prevent weed ingress
Lay a needle-punched, permeable geotextile under shed base to separate soil from the granular layers and to suppress regrowth. Choose a tough grade, typically 300–500 g/m², with good puncture resistance. Overlap joints by at least 300 mm and pin with landscaping staples for full coverage beneath the weed membrane.
Place MOT Type 1 or Type 3 in 50 mm layers, compacting each lift to achieve a dense, level platform. Aim for a finished depth of 75–150 mm to suit the chosen base system, ensuring the surface remains true to the set fall and ready to accept slabs, a concrete pour, a timber frame, or a gravel pad.
Best Base Options: Concrete, Slabs, and Timber Frames
Choosing the right base sets the tone for a dry, stable, and long‑lasting metal shed. In the UK, three proven routes stand out: a cast slab, modular paving, or a raised frame. A fourth, fast-draining option is a gravel pad tied down with suitable fixings. Match the method to soil, load, and access, and confirm compatibility with your chosen ground anchors for sheds.

Concrete slab base: thickness, reinforcement, and curing
For most domestic footprints up to 10 × 8 ft, typical concrete shed base thickness UK is 100 mm over 100–150 mm of compacted sub‑base. Heavier uses, like motorbikes or machinery, call for 125–150 mm. A damp‑proof membrane is laid over the sub‑base and turned up at the edges to form a tray.
A reinforced slab for shed using A142 mesh set mid‑depth, or a fibre‑reinforced C20/25 mix, helps limit shrinkage cracks. Screed to level with a slight fall away from walls, and protect the surface while it cures for at least seven days. Full strength develops by 28 days, which supports accurate bolt‑down anchoring.
Paving slab base: sub-base, compaction, and jointing
A paving slab base for shed can be quicker and very accurate if the groundwork is sound. Lay 100–150 mm of compacted MOT Type 1, then a 30–50 mm sharp sand and cement laying course at around 10:1, or use a full wet bed for maximum stability. Choose 450 or 600 mm concrete slabs of 32–50 mm thickness.
Tap each slab to level with a rubber mallet, maintain fall, and ensure there is no rocking. Finish joints with permeable polymeric sand or mortar. Confirm positions for fixings so the shed rails align with anchors or bolt‑down kits, and ensure the base projects 50–100 mm beyond the footprint.
Pressure-treated timber frame base: bearers, airflow, and protection
A raised timber bearer base suits sloping plots and damp ground. Build a pressure‑treated C16/C24 perimeter with joists such as 47 × 100 mm or 47 × 125 mm at 400–600 mm centres. Support on treated posts, composite pedestals, or ground screws to create clear airflow under the deck.
Use galvanised joist hangers or structural screws, isolate contact points with DPC strips, and treat cut ends. Deck with exterior‑grade plywood (EN636‑3), WBP, or composite boards. A vapour‑permeable membrane beneath the deck helps reduce moisture drive, while raised rails simplify the use of ground anchors for sheds.
Gravel pad with anchors: fast-draining alternative
Where speed and drainage are key, a gravel shed foundation works well on free‑draining soils. Excavate, lay a geotextile, and fill with 100–150 mm of compacted angular gravel, topped with finer material to true the plane. Keep the pad slightly proud and extend it 50–100 mm beyond the shed footprint.
Fix the shed with helical screw anchors or driven spikes through base rails or straps. When paired with robust ground anchors for sheds, this method resists uplift and suits temporary or remote sites, while keeping maintenance simple and access clear.
Moisture Management and Corrosion Protection
Keep the base dry from day one. Form a capillary break with a damp-proof membrane shed layer over concrete, or use plastic packers or DPC strips beneath base rails. Seal the base-to-slab joint with a neutral-cure sealant if the manufacturer says so, but leave vents clear to stop trapped moisture.
Fit guttering for sheds and downpipes to move runoff to a soakaway or water butt in line with SuDS principles. Keep a 150–300 mm gravel strip around the perimeter to cut splashback and deter weeds, and avoid leaning damp kit against the walls.
Condensation control starts at the roof. An anti-condensation lining or factory-applied coating reduces drips in cold snaps. If storing tools or electronics, add breathable insulation with vapour control and keep steady airflow to limit wet/dry cycles.
Most quality units use hot-dip galvanised steel shed protection. After cutting or drilling, treat edges with zinc-rich cold galvanising paint; sacrificial anodes not needed for typical garden use. Choose stainless steel A2/A4 or hot-dip galvanised fixings, and avoid mixing dissimilar metals where water can pool.
For rust prevention UK, wash salt deposits in coastal areas, inspect for scratches, and touch up coatings promptly. Where the base is timber, keep at least 150 mm ground clearance with cross-ventilation to prevent decay, and maintain the capillary break between wood and soil.
Good practice ties it all together: a sound damp-proof membrane shed detail, sensible guttering for sheds, and careful material choices deliver durable performance without fuss.
Levelling, Anchoring, and Fixing Methods
A stable start makes the build smoother and safer. Aim for a level shed base UK standard that keeps the frame true and the doors aligned. Plan for square shed assembly and firm anchoring so the structure stays put through rough weather.

Checking level and squareness before assembly
Use a long spirit level or a laser to verify the slab or frame is flat within a few millimetres. Check both axes and correct high spots before you start.
Measure the diagonals of the footprint to confirm squareness. Small differences cause tight panels and door rub, so adjust packers until square shed assembly reads true on both diagonals.
Anchoring systems: expansion bolts, ground spikes, and screw anchors
On concrete or paving, match fixings to the bolt-down kit metal shed specification, typically M8–M10. Drill to the stated embedment, then brush and blow out dust before setting expansion or chemical anchors for reliable grip.
For gravel pads or firm soil, choose ground spikes or screw anchors shed UK rated for uplift. Tie anchors to the base frame with galvanised brackets or straps for a continuous load path.
Preventing uplift in high winds
Increase anchor count at corners and mid-spans where a wind uplift shed risk is highest. Follow wind exposure guidance and the maker’s layout to space fixings correctly.
Fasten every panel, lap roof sheets with the correct overlap, and fit the ridge with seal washers. Keep doors locked in storms to cut the sail effect; add internal ballast only as a temporary measure.
Isolating metal from ground contact to reduce rust risk
Place DPC under shed rails or use plastic shims so steel never sits on damp surfaces. Seal fastener penetrations, and use nylon or EPDM washers on external fixings to limit water ingress.
Tighten fixings evenly to avoid distortion, then recheck level and plumb as you go. This simple routine secures the level shed base UK setup and supports long-term performance with any bolt-down kit metal shed and screw anchors shed UK system.
Compliance, Safety, and Practical Considerations in the UK
Before you break ground, review UK shed planning rules. Many small garden buildings count as permitted development outbuildings in England and Wales if they are single‑storey, behind the principal elevation, and within height limits. Check eaves under 2.5 m, and total height up to 4 m for dual‑pitched roofs or 3 m for others. Near boundaries, keep height to 2.5 m within 2.0 m. In conservation areas or around listed buildings, these rights may not apply.
Confirm whether a building regulations shed exemption applies. Detached, non‑habitable buildings under 15 m² are usually outside Building Regulations. Units over 15 m² and under 30 m² may also be exempt if at least 1 m from boundaries or built mainly of non‑combustible materials. Where in doubt, consult your local Building Control team.
Work safe from the outset. Use PPE for shed installation—cut‑resistant gloves, safety glasses, and hearing protection when cutting or compacting. Plan lifts and apply proper manual handling shed panels techniques; large sheets are awkward in wind, so organise two‑person carries. When drilling concrete, attach dust extraction and wear an FFP3 mask to reduce silica exposure.
Survey for hidden services before digging or anchoring. Check utility plans and scan with a cable avoidance tool. If you plan a supply, electrical safety garden standards under BS 7671 apply; use a qualified electrician registered with NICEIC or NAPIT for any new circuit or consumer unit connection.
Manage surface water responsibly. Add a slight fall to direct runoff to soakaways or permeable areas on your plot, not to neighbouring land. Dispose of waste through your council’s system; recycle pallets, cardboard, and steel offcuts at appropriate facilities.
Improve security as you build. Anchor the base, fit anti‑tamper fixings, and choose Sold Secure padlocks or ground anchors for bikes and tools. Good lighting and a compact alarm can act as a strong deterrent.
Keep records of dimensions and siting to show alignment with UK shed planning rules. Note materials and clearances that support a building regulations shed exemption. This documentation helps if you later sell the property or upgrade the shed.
Finally, plan access routes and storage so manual handling shed panels is safer during delivery and assembly. Maintain clear walkways, dry footing, and a tidy work zone, keeping PPE for shed installation on hand. Where electrics are added, maintain electrical safety garden practices with correct earthing, RCD protection, and weather‑rated components.
Conclusion
This can i put a metal shed directly on the ground summary is clear: placing a shed on bare soil or grass in the UK is a false economy. Moisture rises, steel corrodes, and wind can shift an unstable frame. Choose the best base for metal shed UK needs—concrete, paving slabs, a raised timber frame, or a compacted gravel pad with anchors—to keep doors true, improve drainage, and allow reliable fixings.
Good groundwork pays off. Strip vegetation, compact a granular sub-base, and set a slight fall to shed water. Add geotextile and, under slabs, a damp-proof membrane. Use gutters, vents, and capillary breaks to prevent rust on metal shed panels and fixings. Galvanised or stainless steel screws, plus prompt touch-ups to chipped coatings, further cut corrosion risk.
Before assembly, verify level and squareness, then select anchors that match your base: expansion bolts for concrete and slabs, screw anchors or ground spikes for timber frames and gravel pads. Account for local wind exposure to secure shed UK installations for storms and gusts. Safe practices and planning checks round out the core shed installation tips that protect your investment.
Prioritise isolation from ground contact and robust anchoring. With a well-built base, sound drainage, and smart moisture control, you achieve a durable, low‑maintenance setup that withstands British weather—an outcome that reflects the best base for metal shed UK guidance and the most practical shed installation tips.
FAQ
Can I put a metal shed directly on soil or grass?
No. Direct ground contact traps moisture, accelerates corrosion, and leads to uneven settlement and poor anchoring. Most manufacturers, including YardMaster, Asgard, Absco, and Biohort, specify a firm, level base such as concrete, paving slabs, a raised timber frame, or a gravel pad with anchors.
What is the best base for a metal shed in the UK?
A 100 mm concrete slab over 100–150 mm of compacted MOT Type 1 is the most durable option. Paving slabs on a solid sub-base, a pressure-treated timber frame with airflow, or a compacted gravel pad with screw anchors also work when installed correctly.
How do I prepare the ground before installing the base?
Strip turf and 75–100 mm of topsoil, remove roots and stones, then lay a permeable geotextile. Add and compact a granular sub-base in layers, establishing a fall of roughly 1:60–1:80 away from the shed to improve drainage.
Do I need a damp-proof membrane under the shed?
Yes for slab bases. Lay a 1200 gauge polythene DPM over the sub-base beneath concrete, and use DPC strips or plastic packers under the shed’s base rails. This capillary break helps reduce condensation and rust at cut edges and fixings.
How do I manage moisture and condensation inside a metal shed?
Fit gutters and downpipes to a soakaway or water butt, keep a clear gravel strip around the perimeter, and maintain cross-ventilation. Consider anti-condensation roof felt or factory coatings, and avoid storing damp items against the walls.
What anchoring method should I use?
On concrete or slabs, use expansion or chemical anchors sized to the manufacturer’s bolt-down kit, typically M8–M10. On gravel or soil, use helical screw anchors or driven ground spikes with galvanised straps. Increase anchors in exposed, windy locations.
How do I ensure the base is level and square?
Check with a long spirit level or laser across the footprint and measure diagonals. Dry-fit base rails and confirm against the manufacturer’s plan to avoid racking and misaligned doors.
What thickness should a concrete slab be for a typical shed?
For sheds up to about 10 x 8 ft (3 x 2.4 m), use 100 mm concrete. Increase to 125–150 mm for heavier loads such as motorbikes. A C20/25 mix with fibre or A142 mesh helps control cracking.
Are paving slabs a good alternative to concrete?
Yes, if laid on a compacted sub-base with a stable laying course and joints that do not wash out. Ensure slabs are level, rock-free, and compatible with the shed’s bolt-down points.
Can I use a timber frame base?
Yes. Build with pressure-treated C16/C24 timber, isolate it from soil with DPC strips, allow airflow below, and deck with exterior-grade plywood or composite boards. Treat cut ends and maintain at least 150 mm of ground clearance.
Is a gravel pad suitable for a metal shed?
It can be effective on free-draining sites. Use geotextile under 100–150 mm of compacted angular gravel and secure the shed with helical screw anchors or spikes. It is quick, well-draining, and ideal for temporary setups.
How do UK climate factors affect shed bases?
High rainfall demands good drainage and fall. Frost can heave fine soils, so a well-compacted sub-base helps. Clay soils shrink and swell seasonally; MOT Type 1 mitigates movement. Coastal salt accelerates corrosion, so maintain galvanised coatings and wash deposits.
What fixings should I use to prevent rust?
Choose stainless steel (A2/A4) or hot-dip galvanised fixings. Protect drilled holes and cut edges with zinc-rich paint, and use nylon or EPDM washers under external fasteners to limit water ingress.
Are there planning rules for sheds under Permitted Development?
In England and Wales, most sheds are Permitted Development if they are single-storey, not forward of the principal elevation, under 2.5 m high within 2 m of a boundary, and meet overall height limits. Check the Planning Portal and your local authority, and note differences in Scotland and Northern Ireland.
Do Building Regulations apply to metal sheds?
Small, detached, single-storey outbuildings under 15 m² used for non-habitable purposes are generally exempt. Buildings between 15 m² and 30 m² may be exempt if at least 1 m from boundaries or substantially non-combustible. Confirm with Building Control.
How can I reduce wind uplift risk?
Use rated anchors at corners and mid-spans, ensure all panels and laps are fully fixed, and keep doors locked in storms to reduce sail effect. Follow Met Office exposure guidance for coastal and upland sites and manufacturer advice.
What safety measures should I follow during installation?
Wear gloves, safety glasses, and hearing protection when cutting or compacting. Lift panels with two people, use dust extraction and an FFP3 mask when drilling concrete, and check for underground services using LinesearchbeforeUdig and a cable avoidance tool.
Can I run electricity to a metal shed?
Yes, but it must comply with BS 7671. Use a registered electrician through NICEIC or NAPIT, and consider RCD protection and suitable IP-rated fittings for damp environments.
How much clearance should I leave around the shed?
Allow 300–600 mm on sides and rear for ventilation, gutter cleaning, painting, and anchor access. Plan for door swing, ramps, and material handling space during installation.
What about nearby trees and roots?
Avoid siting under dense canopies that drip and shed debris. Keep clear of thirsty species like willow or poplar whose roots can disturb slabs and affect drainage. Maintain a clean gravel perimeter to prevent splashback and plant growth.
How long should concrete cure before assembling the shed?
Protect and cure the slab for at least 7 days before light loading. Full design strength is typically reached at 28 days; avoid heavy anchors or point loads until then.
Will a metal shed warranty be affected by the base I choose?
Yes. Many manufacturers state that placing a shed on bare soil or an uneven base can void warranties. Follow guidance from YardMaster, Asgard, Absco, or Biohort for approved base types and anchoring methods.