Adding Shelves to a Keter Shed: FAQ Guide

Thinking about extra storage in a resin shed and wondering, can you add shelves to a Keter shed? This short FAQ-style guide gives clear, practical answers for UK owners. We focus on popular ranges such as Keter Manor, Factor, Darwin, Oakland, and Artisan, and explain the safest ways to plan and fit shelves for outdoor shed organisation.
You will learn how Keter storage solutions work with polypropylene walls and steel reinforcement, how to spot pre-moulded fixing points, and how to avoid damaging structural ribs. We also outline Keter shed shelves UK options, from Keter compatible shelves to third-party resin shed shelving that fits without voiding a warranty.
We cover Keter shelf installation step by step, including suitable tools and corrosion-resistant hardware for British weather. By the end, you will know how to distribute weight, protect the shed structure, and keep everything tidy all year round.
Inhaltsverzeichnis
Key Takeaways
- This guide answers the question: can you add shelves to a Keter shed? and shows how to do it safely in the UK.
- It explains Keter storage solutions, from Keter compatible shelves to third-party resin shed shelving.
- Advice applies to common UK models, including Manor, Factor, Darwin, Oakland, and Artisan.
- You will learn where to mount shelves, how to use pre-moulded points, and how to avoid structural ribs.
- Keter shelf installation tips include the right fixings for polypropylene and corrosion-resistant hardware.
- Guidance on safe load distribution and outdoor shed organisation for British conditions.
Understanding Keter shed construction and load-bearing limits
Keter sheds use engineered plastics and hidden metalwork to balance durability with ease of care. The outer skin is formed from Keter resin panels made from injection-moulded polypropylene, delivering weather resistance and low maintenance. Inside selected models, a steel-reinforced shed frame stiffens key zones to improve Keter wall strength under daily use.
The make-up of the walls and frame sets the resin shed load rating for shelves and mounts. Knowing where loads can transfer into the structure helps prevent flex, cracks, and fixings pulling free from polypropylene shed walls.
How Keter’s resin panels and steel reinforcement work
The resin skin resists rain, UV, and knocks, while the internal steel elements carry concentrated loads. Galvanised or powder-coated members often sit around door jambs, roof trusses, and corner uprights. This pairing lets Keter resin panels absorb weather and impact, as the steel-reinforced shed skeleton handles higher point loads from shelves and hooks.
Textures such as DUOTECH or Evotech mimic timber but keep the benefits of polypropylene shed walls. Together, these layers increase Keter wall strength where bracing is present and guide where heavier items should be supported.
Identifying safe fixing points without voiding warranties
Most models mark Keter warranty fixing points with moulded bosses, recessed flats, or dedicated anchor symbols shown in the assembly guide. These areas align with braced ribs or embedded metal, improving grip and reducing stress on the panel skin.
Avoid drilling into unsupported sections or roof panels, as this can weaken joints and affect coverage. Use only designated points so any bracket load feeds into reinforced structure and preserves the resin shed load rating.
Typical weight capacities for shelves and wall mounts
Factory shelf kits list a Keter shelf weight limit per shelf, often in the 20–40 kg range when fixed to approved locations. The exact figure varies by bracket design and panel type, so never exceed the stated per-point rating.
Freestanding racks may hold much more because weight transfers to the floor. Still, remember overall resin shed load rating includes the base: firm foundations help keep loads stable, and heavy items should sit low to reduce strain on walls and fixings.
can you add shelves to a keter shed?
Yes, you can add shelves Keter shed models in most cases. The key is to follow the assembly manual for your specific unit and respect the stated load ratings. Many designs mark approved fixing zones that accept light-to-medium loads, making Keter shelf compatibility straightforward when the correct brackets and anchors are used.
Where walls are rated only for lighter items, choose Keter wall-mounted shelves for approved points, or opt to install shelves in resin shed spaces using freestanding or floor-to-ceiling tension systems. This avoids stressing the polypropylene panels and keeps the structure sound during everyday use.
Homeowners planning resin shed modifications UK often mix official kits with modular units from brands that cater to plastic sheds. For heavier gear, freestanding industrial racks that bear on the floor are safer and more stable, while lighter items suit mounted rails within the indicated mounting zones.
Check model guidance before drilling, select corrosion-resistant fixings, and space loads evenly to maintain integrity over time. With careful planning, you can add storage while keeping Keter shelf compatibility in line with warranty terms.

Compatible shelving options for Keter sheds
Choosing shelves that respect resin construction keeps your shed tidy and safe. Match products to pre-moulded points, allow door swing, and keep a clear walkway. The best plastic shed shelving options balance strength, airflow, and easy upkeep.
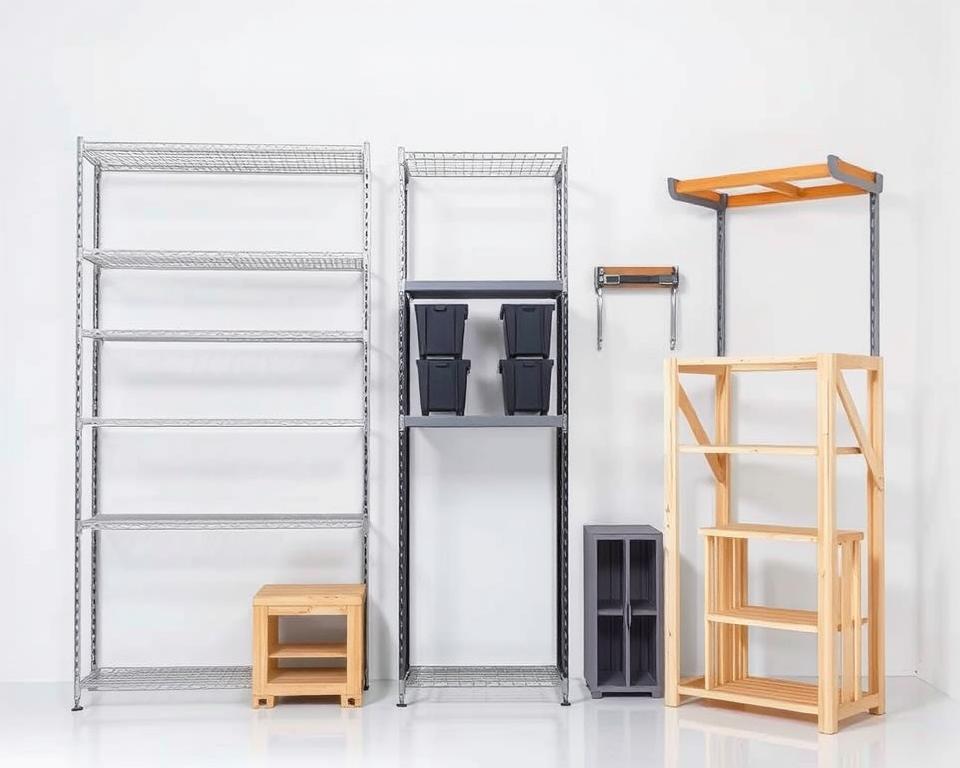
Using Keter’s proprietary shelf kits and brackets
A Keter shelf kit aligns with reinforced slots inside many popular models. These kits pair with Keter wall brackets to transfer load into ribs, reducing stress and the risk of cracking.
Some sheds arrive with ready-to-use bracket bays; others accept boards cut to size on the supplied supports. For light to medium loads, wall-mounted shelves Keter are neat and secure when fixed only to approved points with the recommended screws.
Third-party modular shelving that fits resin sheds
Third-party options broaden plastic shed shelving options without touching the walls. Brands such as Gorilla Racking, Hyfive, and B&Q’s Diall offer units that suit a modular shelving resin shed layout.
Plastic-coated wire shelves improve airflow and resist corrosion. Check height and depth so doors close cleanly and the roof slope is clear. Keep space for tools to pass safely.
Freestanding versus wall-mounted solutions
Freestanding shelving UK puts weight on the floor, which suits heavy tins, batteries, and power tools. It avoids warranty risks and can be moved to adapt the layout.
Wall-mounted shelves Keter save floor area for lawn gear and bins. Use the correct Keter wall brackets and stay within stated loads. Corner units can work well if they respect wall curvature.
| Option | Best Use | Load Path | Pros | Watch-outs |
|---|---|---|---|---|
| Keter shelf kit + Keter wall brackets | Light to medium items; preserving wall integrity | Into reinforced ribs via approved fixing points | Clean fit, neat look, maintains warranty intent | Model-specific; confirm bracket slots and screw spec |
| Third-party wire racking (Gorilla, Hyfive, Diall) | General storage in a modular shelving resin shed plan | Direct to floor | Great airflow, corrosion resistance, flexible sizing | Measure depth to avoid door clash and narrow aisles |
| Freestanding shelving UK (heavy-duty steel) | Heavy loads like paint, toolboxes, fixings | Floor bearing; no wall stress | High capacity, no drilling, easy to relocate | Needs level base; may reduce floor area |
| Wall-mounted shelves Keter (approved fixings) | Small items, tubs, and light kit | Reinforced rails and bracket points | Saves floor space, visible and organised | Observe weight limits; avoid non-reinforced panels |
Tools and fixings recommended for resin shed installations
Choosing the right kit prevents cracked panels and loose shelves. Match your approach to Keter’s resin construction, keep loads spread, and control torque for a clean, durable fit.

Drill bits, screws, and anchors suited to polypropylene
Use sharp polypropylene drill bits or standard HSS at low speed to avoid melting. Step bits help enlarge holes cleanly when you need a snug fit.
Pick resin-safe screws with pan or washer heads to spread load; avoid countersunk heads that can bite into panels. Where specified, fit the exact plastic anchors resin recommended by Keter and never swap in masonry plugs.
If through-bolting into steel rails, use machine screws with washers and nyloc nuts. Nylon spacers or rubber washers reduce stress and prevent pull-through.
Corrosion-resistant hardware for outdoor conditions
For coast or damp sites, choose A2 or A4 stainless steel screws outdoor to resist rust. Inland, hot-dip galvanised fixings shed or quality zinc-plated fasteners are acceptable, but inspect them periodically.
Use a torque-limiting driver to prevent over-tightening, and pair fixings with wide washers to protect the resin surface. Keep a spirit level or laser level handy for accurate alignment.
Sealants and weatherproofing considerations
Avoid piercing exterior panels unless the manual allows it. If a penetration is unavoidable, apply a neutral-cure weatherproof sealant UK such as Soudal or Everbuild, then cap with trim washers for a neat, watertight finish.
Do not use harsh solvents that can dull UV-protected surfaces. Wear eye protection and gloves while drilling and fixing to maintain safety and control.
| Task | Preferred option | Why it works on resin | Brands/examples |
|---|---|---|---|
| Drilling pilot holes | HSS or polypropylene drill bits at low RPM; step bit for enlarging | Reduces heat and prevents melting or burring | Bosch HSS-G, Makita step bit |
| Fastening to panels | Resin-safe screws with pan/washer heads | Spreads load and avoids cracking from countersunk heads | Spax pan-head, Forgefix washer-head |
| Anchoring where specified | Plastic anchors resin matched to Keter guidance | Correct expansion in polymer without over-stressing | Fischer nylon anchors |
| Through-bolting to rails | Machine screws, washers, nyloc nuts | Prevents pull-through and loosening under load | Stainless A2/A4 sets, Nyloc nuts |
| Outdoor corrosion defence | Stainless steel screws outdoor; galvanised fixings shed inland | Long-term resistance to rust and staining | Timco stainless, Rawlplug hot-dip galvanised |
| Sealing penetrations | Neutral-cure weatherproof sealant UK with trim washers | Maintains waterproofing without attacking resin | Soudal, Everbuild |
Step-by-step approach to planning your shelf layout
Begin shed layout planning with a quick audit. Group items by how often you use them and by weight. Keep seasonal or bulky kit together so the shed organisation plan stays simple and safe.
Start measuring shed interior with care. Note door swing, window positions, roof pitch, and any internal ribs or reinforcement rails in your Keter model. Mark approved fixing zones from the manual before you sketch elevations for shelf placement Keter and spacing shelves.
Place heavy boxes and tools low on freestanding units. Use wall-mounted levels for lighter, grab-and-go items. Maintain about 600 mm as a clear walkway so you can move without knocks or snags.
Check the base. Whether it is a concrete slab, paving, or a timber deck, it must be level and able to carry the load. Correct dips to prevent racking in freestanding frames and to keep spacing shelves accurate.
Choose shelf depths that do not foul the doors and give head room under the roof trusses. Allow airflow around paint tins, garden feed, and power tools; wire or slatted boards help cut condensation.
Leave room for growth. A modular bay you can extend later keeps the shed organisation plan flexible. List brackets, fixings, and boards such as plywood, OSB, or composite, and pick moisture-resistant finishes that suit British weather.
Build in weight planning from the start. Use the maker’s ratings to set an approximate kg per shelf and note these on your sketch. Mark bracket centres on the wall before drilling so measuring shed interior translates into precise installation.
| Planning Task | What to Check | Target/Tip | Why It Matters |
|---|---|---|---|
| Item audit | Use frequency; weight class | Light items up high; heavy low | Feeds weight planning and safe access |
| Dimensions | Doors, windows, ribs, roof pitch | Accurate measuring shed interior | Prevents clashes and poor shelf placement Keter |
| Walkway | Clearance between units | ≈600 mm where possible | Reduces trips and bumps |
| Base condition | Level, type, load capacity | Shim or fix uneven spots | Stops racking; keeps spacing shelves true |
| Shelf depth | Door arc; head clearance | Shallow near doors, deeper on back wall | Preserves access and comfort |
| Ventilation | Air gaps, slatted surfaces | Wire or slatted boards | Lowers condensation risk |
| Expansion | Future bays; adjustability | Modular uprights and shelves | Keeps the shed organisation plan adaptable |
| Load ratings | Manufacturer guidance | Set kg limits per shelf | Anchors weight planning to real limits |
| Mark-out | Bracket centres; fixing zones | Pencil lines at final heights | Ensures precise shelf placement Keter |
Installation best practice to protect the shed structure
For a safe installation Keter users can trust, start with clear marks and measured lines. Good planning supports shed bracket alignment, keeps loads stable, and ensures any fix to shed frame points are sound.
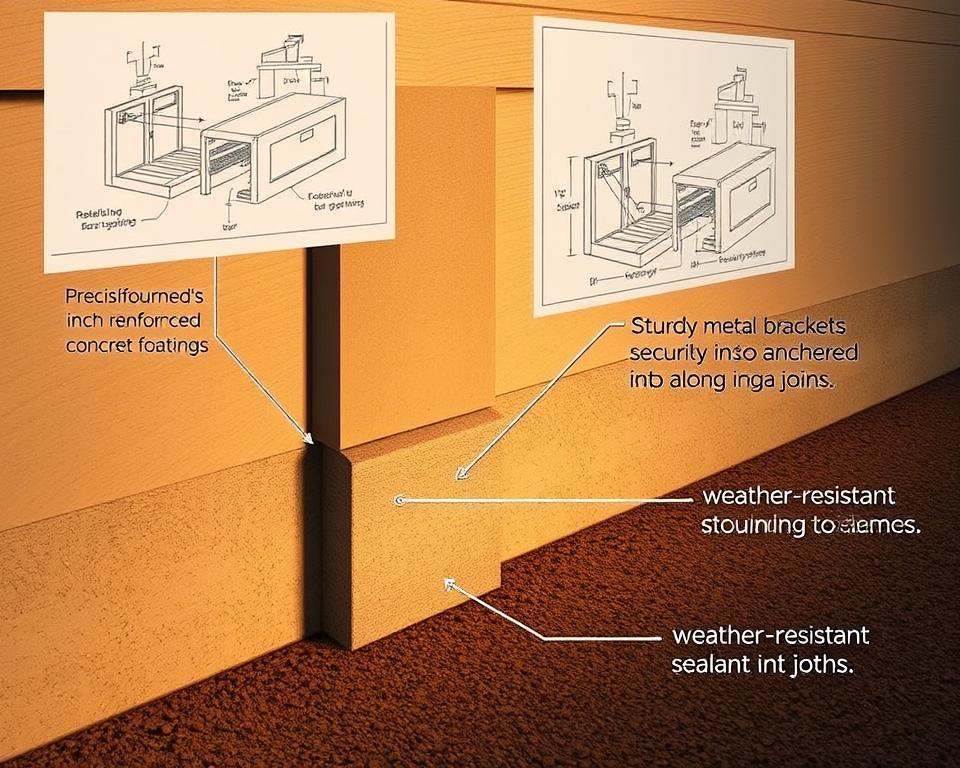
Marking and levelling for accurate alignment
Use a sharp pencil and short strips of masking tape to mark bracket edges and screw centres. Check shelf levelling shed lines with a spirit or laser level along the wall and across the front edge.
Verify level at more than one point to account for an uneven base. Adjust bracket heights before drilling to maintain clean shed bracket alignment across bays.
Avoiding structural ribs and stress points
Pilot drill slowly to limit heat, then lightly deburr if needed. Do not drill roof panels, thin window frames, or door surrounds.
Always avoid resin ribs unless the model manual allows fixing there. These ribs carry shear and bending loads; piercing them can weaken panels and compromise a safe installation Keter owners expect.
Securing shelves to framing or support posts
Where metal reinforcement rails or corner posts are present, fix to shed frame using the specified machine screws and washers. Space brackets to spread pressure and use wide-backed designs where possible.
If the shed lacks approved wall fixings for your load, add vertical support posts that bear on the floor, or choose freestanding shelving. This approach moves weight off the resin skin while preserving shed bracket alignment.
Testing load safely before full use
After fitting, run a staged shelf load test. Start at 25% of the rated capacity and watch for panel deflection or fastener movement.
Increase to 50% and 75%, pausing to inspect for creep or audible cracking. Keep fasteners snug, not overtightened, and if issues appear, reduce weight or shift to freestanding support for a safe installation Keter users can rely on.
Maximising storage space and organisation
Start by using height wisely. Stack adjustable, space-saving shelving to just below the roof trusses, keeping clear headroom for easy movement. Run narrow-depth shelves along the side walls and place deeper units at the back to form a natural aisle. This layout suits small shed organisation and keeps everything within reach.
Make corners work hard. Fit corner shelves shed with triangular brackets so doors swing freely. Pair this with vertical storage Keter solutions for long items like rakes and brooms. For lighter kit, choose tool hangers resin shed users rate for compatibility with reinforced fixing points.
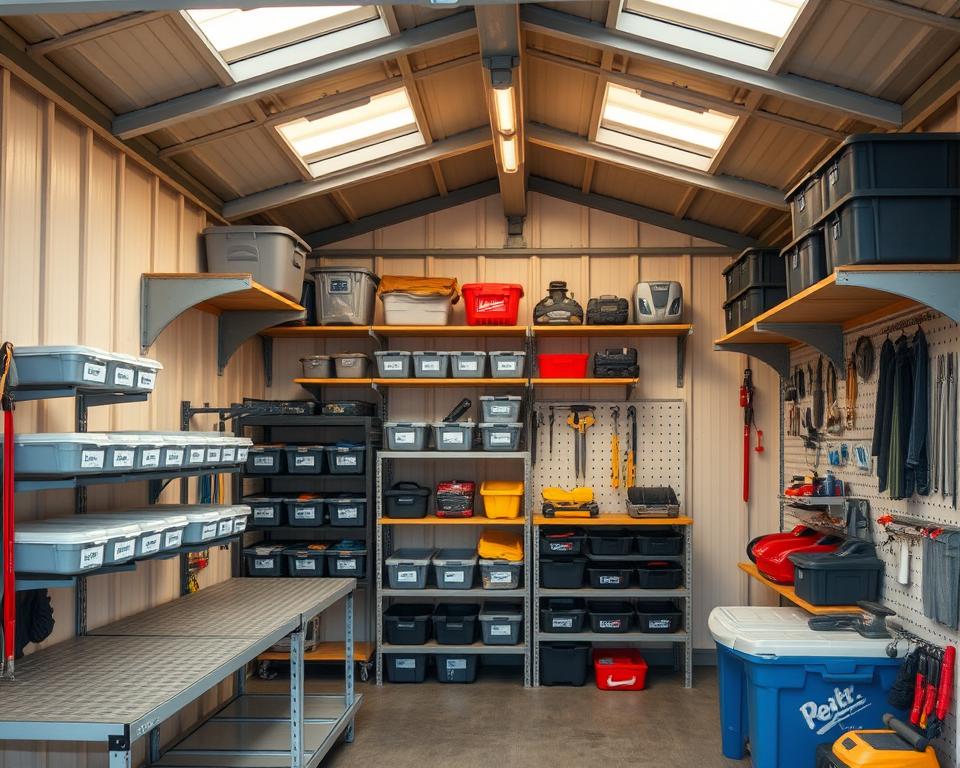
Sort items by how often you use them. Put clear boxes with lids up high for rarely used gear. Keep everyday tools at mid-height, clearly labelled. Store liquids, oils, and paints low down in a ventilated spot to reduce spill risk and smells, and maintain airflow around lawn equipment to limit fuel odours and condensation.
Integrate practical restraints. Use bungee cords or strap systems on freestanding racks so items will not topple when the doors move or during strong winds. Add hook rails and lightweight organisers that suit resin panels, avoiding heavy cantilever loads on thin sections to protect the structure.
Consider seasonal rotation. Group winter and summer items into bins, then swap their positions twice a year for faster access. For compact footprints, blend shed storage ideas UK with space-saving shelving to keep the floor clear and traffic routes open.
Only add overhead solutions when the model has rated roof trusses and an official accessory path. If in doubt, skip ceiling mounts. A balanced mix of corner shelves shed, vertical storage Keter options, and tool hangers resin shed fixtures will deliver order without strain on the walls.
Safety, maintenance, and seasonal care for shed shelves
Smart routines keep storage stable all year. Focus on shed safety UK by pairing sensible loading with regular checks and simple moisture control. This supports Keter shelf upkeep and extends the life of your fittings.
Weight distribution and safe loading habits
Prioritise shelf load safety by spreading weight across each level. Keep the heaviest boxes on the lowest shelves to lower the centre of gravity and cut the risk of tipping.
Respect per-shelf and bracket ratings from Keter or the hardware brand. Avoid point loads from dense items; place a sturdy board under paving slabs, paint tins, or batteries to distribute weight.
After adding new gear, review the layout to maintain safe margins. Relevel freestanding racks if the base settles to prevent racking.
Moisture control, ventilation, and rust prevention
For a condensation control shed, keep vents clear and allow airflow behind shelves. In damp spells, use moisture absorbers; a low‑watt dehumidifier helps if power is available.
Choose plastic or powder‑coated wire to aid rust prevention outdoor shelving. Wipe away beads of water on cold mornings, and store tools dry to protect fixings and boards.
Where metal parts are not stainless or hot‑dip galvanised, apply a light oil once a year. This simple step slows corrosion in the UK climate.
Routine checks, retightening, and replacements
Work through a concise shed maintenance checklist each season. Look for creep, sagging, loose fasteners, and cracked resin near fixings, especially on high‑use shelves.
Retighten screws with care to avoid over‑torque. Replace corroded screws, bowed boards, and any deformed brackets promptly to maintain Keter shelf upkeep.
After heavy rain, check the base for water ingress or settlement. Adjust loads, relevel racks, and log changes so shed safety UK and shelf load safety remain consistent over time.
Conclusion
The best way to add shelves to Keter shed spaces is to respect the resin shell and steel reinforcement. Use approved fixing points, keep within stated loads, and choose hardware that suits polypropylene. This Keter shelving conclusion highlights how Keter brackets and shelf kits make light-to-medium wall storage simple, while freestanding steel racks handle heavier items without stressing the panels.
Plan for what you store, not just where it fits. Place heavy gear low and near supports, keep lighter items higher, and level each run with care. Test loads in stages and use corrosion-resistant screws and anchors. These Keter shed organisation tips align with resin shed best practice and help keep your structure safe over time.
To make the most of the footprint, use vertical space, corners, and the back of doors where approved. Maintain airflow to limit condensation, and carry out seasonal checks after frost, heat, or storms. With this UK shed storage advice, you can build neat, durable storage that protects your belongings and preserves the shed for years.
FAQ
Can you add shelves to a Keter shed?
Yes. Most Keter sheds support shelving when you use approved fixing points or freestanding racking. Follow your model’s manual and stick to stated load ratings to protect the polypropylene resin panels and the warranty.
Which Keter models in the UK accept shelves?
Popular ranges such as Keter Manor, Factor, Darwin, Oakland, and Artisan typically include pre-moulded bosses or bracket slots. Many DUOTECH and Evotech panels also indicate anchor points. Check the specific manual to confirm compatible shelf kits and wall mounts.
How do Keter’s resin panels and steel reinforcement work?
The injection-moulded PP resin provides weather resistance, while galvanised or powder-coated steel elements stiffen corners, door frames, and trusses. Fix to the designated points so loads transfer into reinforcement, not thin skins.
What are typical weight limits for shelves and brackets?
Keter proprietary shelf kits often rate around 20–40 kg per shelf when fixed to approved points. Do not exceed per-point or wall panel ratings. For heavier loads, use freestanding racks that bear on the floor and base.
Will drilling new holes void the warranty?
It can. Use only marked fixing zones such as moulded bosses or recessed flats. Avoid drilling unsupported resin, roof panels, or window frames. If in doubt, choose freestanding shelving to stay within warranty terms.
Should I pick wall-mounted or freestanding shelves?
Freestanding racks offer higher capacity and avoid stressing walls—ideal for paint tins, compost, and power tools. Wall-mounted shelves save floor space for lighter items when attached to approved points with the correct brackets.
Which third-party shelving brands fit Keter sheds?
UK options include Gorilla Racking, Hyfive, and B&Q’s Diall. Select units that clear the roof slope and door swing, and check depth for safe walkways. Wire shelving with plastic-coated steel promotes airflow and resists corrosion.
Do Keter sell proprietary shelf kits and brackets?
Yes. Many models accept Keter shelf kits that align with pre-formed mounting points. Some kits take boards cut to size. Using official brackets helps distribute load and reduces the risk of panel cracking.
What screws and drill bits work with polypropylene resin?
Use sharp HSS or brad-point bits at low speed, and self-tapping pan- or washer-head screws to spread load. Avoid countersunk heads that bite and crack resin. Where rails are provided, use matching machine screws with washers and nyloc nuts.
Which hardware resists UK weather best?
A2 or A4 stainless steel is ideal, especially in coastal or damp areas. Hot-dip galvanised or quality zinc-plated fasteners also work inland. Add nylon spacers or rubber washers to cushion resin and reduce stress.
Do I need sealant if I penetrate an exterior panel?
Avoid exterior penetrations unless the manual permits them. If unavoidable, use a neutral-cure silicone or polyurethane sealant from brands such as Soudal or Everbuild, with trim washers for a neat, weatherproof finish.
How should I plan the shelf layout?
Audit what you’ll store, group by weight and usage, and measure internal dimensions. Keep a 600 mm aisle where possible. Place heavy items low on freestanding units, and use lighter wall shelves for frequently used items.
How do I avoid damaging structural ribs?
Never drill ribs unless the manual marks them as fixing points. They carry shear and bending loads. Target only the indicated bosses, rails, or corner posts, and distribute weight across wide-backed brackets.
What’s the best way to mark and level brackets?
Use pencil and masking tape for clear marks. Check with a spirit or laser level across multiple points to counter floor unevenness. Pilot drill slowly, then deburr lightly for clean fastener seating.
How do I test shelf capacity safely?
Load in stages: 25%, then 50%, 75%, and finally the rated maximum. Pause between steps to check for panel deflection, fastener movement, or cracking. If you see creep, reduce load or switch to freestanding support.
How can I maximise storage in a compact Keter shed?
Go vertical to just below roof trusses, use narrow shelves along sides, deeper units at the back, and corner shelves with triangular brackets. Keep door swing clear and maintain airflow to reduce condensation.
Are ceiling or roof-mounted storage options safe?
Only if your model includes rated roof trusses with official accessory compatibility. Most resin roofs are not designed for added loads. Consult the manual before considering overhead storage.
What base should support heavy freestanding racking?
A level, solid base such as a concrete slab or well-laid paving is best. Check for settlement and relevel racks as needed. The shed floor panel’s capacity also matters when storing dense items.
How do I control moisture and prevent rust?
Keep vents clear, use moisture absorbers or a low-watt dehumidifier if powered, and choose stainless, galvanised, or powder-coated wire shelves. Dry wet tools before storage and wipe off condensation in winter.
What routine maintenance should I do?
Each season, inspect for loose fasteners, sagging, cracked resin, and corrosion. Retighten gently to avoid over-torque. Replace bowed boards and any rusty screws. Review your load after adding new items.
What tools are essential for installation?
A torque-limiting driver, HSS or brad-point bits, spirit or laser level, tape measure, eye protection, and gloves. Use the exact anchors specified by Keter where provided, and avoid masonry plugs in resin panels.
What shelf boards work well in sheds?
Moisture-resistant plywood, OSB3, composite boards, or plastic-coated wire shelves. Seal cut edges on timber boards to limit swelling, and check depth to keep pathways clear.
Can I use adjustable uprights designed for brick walls?
Not unless your Keter model provides reinforced rails rated for them. Standard resin panels are unsuitable for masonry-style uprights. Use Keter brackets or freestanding modular systems instead.
