Garden Shed Care: Treat with Wood Preservative
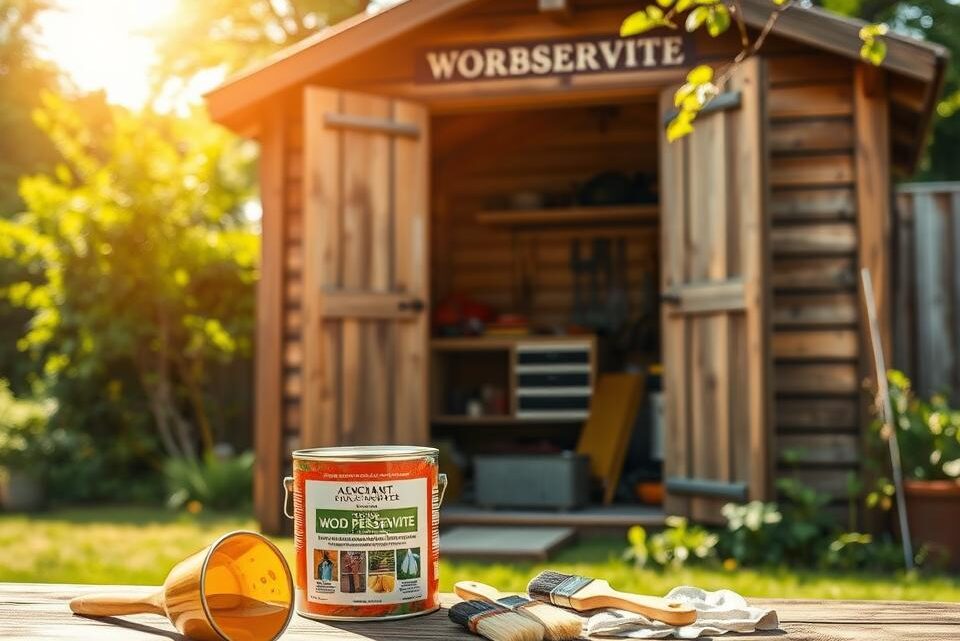
To treat the garden shed with wood preservative is a simple, effective step that prevents timber decay and keeps a shed serviceable for years. This introduction explains why treating timber matters in the UK climate and sets out practical guidance for householders who want durable, low‑maintenance garden buildings.
The main objective is clear: protect against rot, fungal attack and insect infestation to extend service life and reduce long‑term maintenance costs. In Britain’s damp climate, driven rain and seasonal temperature swings accelerate deterioration, so timely timber treatment UK is essential for shed rot prevention.
Practical options in the marketplace include wood preservative for sheds from recognised suppliers such as Cuprinol, Ronseal, Sadolin and Sikkens. These product ranges make it straightforward to find a formulation suited to garden timber, whether you need a water‑based treatment or a solvent‑based preservative.
This article will guide you through why you should treat timber, how to prepare your shed, step‑by‑step application methods, and how to choose the right preservative. You will also find advice on tools and safety, seasonal timing, protecting fittings, finishing coats and common mistakes to avoid, all tailored for UK householders focused on garden shed care.
Inhaltsverzeichnis
Key Takeaways
- Treating early prevents rot and reduces repair bills.
- Choose products from trusted brands like Cuprinol or Ronseal.
- Consider weather and drying times when planning work.
- Prepare surfaces properly for best preservative adhesion.
- Follow safety guidance for handling and disposal.
Why treating a garden shed with wood preservative matters for longevity
Timber left exposed to the British climate faces a range of threats that shorten service life. Moisture from rain, poor drainage and condensation feeds fungal growth. Sun, wind and freeze–thaw cycles wear surface fibres and finishes. Poor detailing, such as ground contact or unsealed cut ends, speeds up damage. Understanding these timber decay causes UK helps owners act before problems become severe.
Common biological attacks include wet rot, dry rot and infestations by wood-boring beetles such as the common furniture beetle. These pests and fungi weaken beams, panels and fixings. Early treatment can prevent rot and woodworm from gaining a foothold and becoming costly to remediate.
Applying a suitable preservative will extend shed lifespan by protecting the timber against decay and insect attack. Preservatives work as fungicides and insecticides, slowing or stopping colonisation. Treated timber keeps its structural integrity longer, reducing the need for replacement boards and major repairs.
Practical benefits include fewer reactive jobs and lower long-term spend. Regular, preventative care delivers clear cost savings wood treatment when compared with the price of replacing damaged cladding or rebuilding sections of a shed. Routine treatment also protects doors, frames and joinery from distortion.
Early treatment brings environmental benefits timber preservative by cutting waste from replaced timber and reducing the need for intensive remediation. Modern water-based options tend to have lower VOCs and clearer disposal guidance, making them easier to use responsibly in UK gardens.
Structurally, treated timbers hold fasteners and joints better and resist distortion. This stability preserves rooflines, doors and windows and reduces safety risks. A small investment in preservative can deliver long-term performance gains and help extend shed lifespan with minimal ongoing maintenance.
To treat the garden shed with wood preservative
Treating timber correctly starts with sensible preparation. Before you begin, clear the shed of tools, shelving and clutter. Protect nearby plants and patios with polythene sheeting. Check ventilation and set up a stable ladder or planks for safe access.

Carry out a close inspection for rot, insect activity and loose coatings. Mark any boards that need repair or replacement. Remove flaking paint and surface contaminants first. Use a moisture meter where possible; many products require timber below 18–20% for good uptake.
Preparing the shed for treatment
Work in small stages and treat cut ends and joints before large surfaces. Mask or remove metal fittings and glazing to avoid staining. Clean mould and algae away with a suitable cleaner and let everything dry thoroughly before applying preservative.
Choosing application methods suited to your shed (brush, spray, dip)
Decide on method according to size and access. For tight joints, use a brush to work preservative into edges and cut ends. A spray suits large panels and cladding and speeds up work. Dip or immersion gives the deepest penetration but usually applies to untreated boards prior to assembly.
Many professionals use a combination method. Pre-treat cut ends with a brush, spray main faces and then back-brush to ensure even coverage. When spraying, wear an appropriate respirator and eye protection and follow product instructions.
Step-by-step treatment procedure for best results
1. Remove or mask hardware and open up the shed for airflow.
2. Clean surfaces of dirt, algae and old coatings and allow to dry.
3. Apply preservative to every exposed surface, paying attention to base boards, door bottoms and cut ends.
4. Follow manufacturer guidance on coats and coverage; many jobs need at least two coats and specific m² per litre rates.
5. Allow the recommended curing interval before overcoating with paint or stain if required.
6. Refit fixtures, return contents and remove protective coverings once the preservative has settled.
Drying and curing times to expect in British weather
Drying times vary with formulation and conditions. Water-based preservatives can be surface-dry in 2–6 hours in warm, dry spells. Solvent-based types often take 6–24 hours or longer. Low temperatures and high humidity extend the process.
Deep cure and full penetration may need days or even weeks. Avoid applying when rain is likely within the surface-dry window. In autumn and winter, allow extra time and plan larger projects for late spring or summer when drying times are shorter.
Choosing the right wood preservative: types and formulations
Selecting the correct product starts with understanding the main types of wood preservative on the market. Choice affects longevity, appearance and safety. Read labels for intended use, ground contact rating and compatibility with finishes.

Water-based versus solvent-based preservatives
Water-based preservative UK products give lower odour and reduced VOCs. They dry quickly and clean up with water. These finishes work well on indoor timber and many outdoor surfaces, but check whether a product is rated for ground contact.
Solvent-based wood treatment often penetrates dense timbers more deeply. Formulations with oil carriers resist weathering for longer and suit heavy-duty exterior use. Use PPE when applying solvent-based options and follow disposal guidance on the label.
Biocidal active ingredients and what they protect against
Common biocides used in wood preservative range from borates and copper compounds to isothiazolinones, IPBC and permethrin derivatives. Each active ingredient targets specific threats like decay fungi, woodworm or surface mould.
Borate treatments perform well against fungi and insects but are water-soluble. If you choose borates, protect treated timber from direct rain and consider sealing with a suitable finish. Copper-based actives suit exterior applications needing long-term decay protection.
Considerations for pressure-treated timber and reclaimed wood
Factory-treated, pressure-treated timber usually carries a durability class and may not require further preservative. Follow pressure-treated timber guidance for cut ends: reseal with an end-grain preservative to maintain protection.
Reclaimed wood carries unknown histories. Inspect for previous treatments, hidden insect activity or moisture damage. For high-value or suspect pieces, seek laboratory testing or specialist advice before reusing in a shed.
| Characteristic | Water-based preservative UK | Solvent-based wood treatment | Typical biocide examples |
|---|---|---|---|
| Odour and VOCs | Low odour, low VOCs | Higher odour, higher VOCs | Varies: borates, copper, isothiazolinones |
| Penetration depth | Good for surface and softer timbers | Better for dense, hardwood timbers | Depends on carrier and formulation |
| Suitable use | Indoor, above-ground and some exterior use | Exterior, weather-exposed and heavy-duty use | Exterior-grade for decay and insect control |
| Cleanup and safety | Cleans with water; lower PPE needs for brief tasks | Requires solvent-safe cleanup and strict PPE | Follow label for safe handling and disposal |
| Compatibility with overcoats | Better with water-based overcoats; check labels | May resist bonding with some water-based finishes | Compatibility varies; test on a sample area first |
Preparing timber surfaces: cleaning, repair and sanding
Good preparation makes preservative treatments work better and last longer. Start by assessing each board, joint and frame member so you know where to clean, repair or replace. Take care with thin cladding and old paint layers to avoid causing more harm than good.
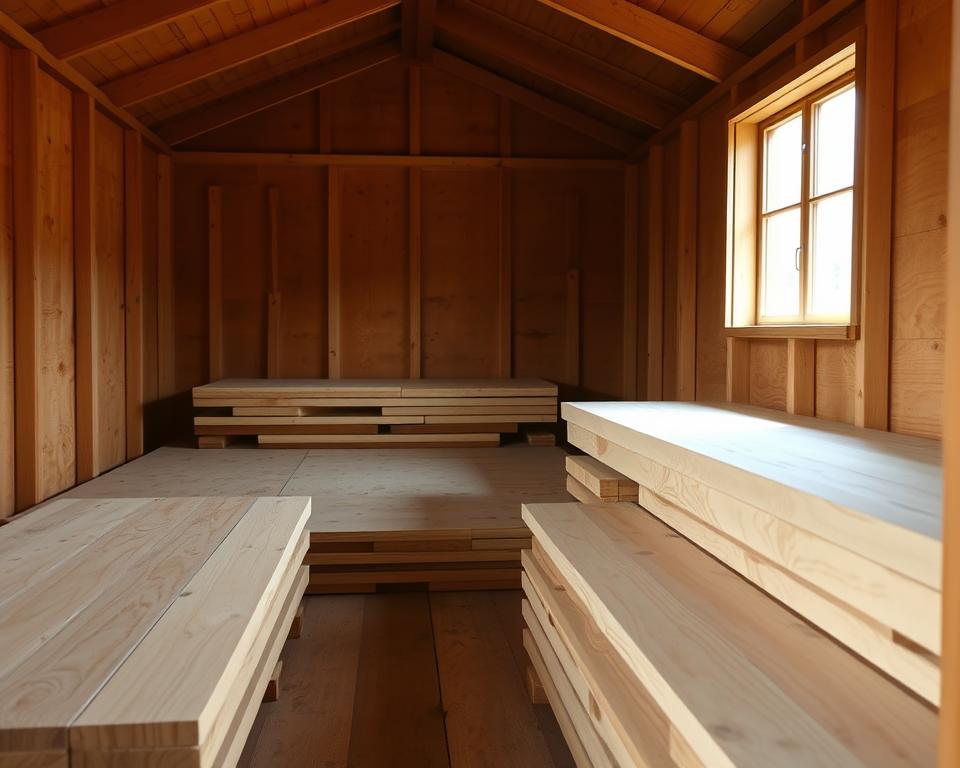
Use a firm brush and a mild detergent or a specialist timber cleaner to clean shed surfaces. Products such as Ronseal Deck Cleaner or Cuprinol Garden Wood Cleaner are suited to the task when used as directed. Low-pressure rinsing can help, but avoid aggressive jetting on thin boards.
For stubborn growth, choose a sodium percarbonate cleaner or a fungicidal wash to remove mould from wood safely. Work in small sections and allow treated areas to dry fully before moving on to sanding or further repair.
Remove loose paint and flaking coatings with a scraper and coarse sanding. If you suspect lead paint on an older shed, seek licensed advice and follow hazardous-waste regulations. Never mix these steps with preservative application; the surface must be clean and dry first.
Cut out minor rot with a chisel back to firm, dry timber and treat the exposed surface with a preservative. Consolidants or epoxy fillers restore strength where decay is limited. For areas beyond repair, replace boards using preservative-treated timber and seal all cut ends to reduce future ingress.
Ensure joints and overlaps sit flush and are correctly bedded. Use stainless steel or galvanised fixings to prevent corrosion and staining. For serious framing defects or structural rot, consult a qualified carpenter or timber specialist.
Sanding prepares the wood for treatment by removing loose fibres and providing a keyed surface. Choose grit between 80 and 120 depending on timber type; finish with finer paper only when overcoating with paint or stain is planned.
Avoid over-sanding softwoods to prevent feathered edges that soak up finish unevenly. Remove dust with a vacuum or tack cloth to ensure preservative contact and penetration. Good sanding for preservative adhesion improves uptake and reduces waste.
| Task | Recommended approach | Common pitfalls |
|---|---|---|
| Cleaning | Firm brush, mild detergent or specialist cleaner; low-pressure rinse; dry thoroughly | High-pressure washing on thin cladding; leaving surfaces damp |
| Removing mould | Sodium percarbonate or fungicidal wash applied to affected areas; follow label | Using household bleach without rinsing; skipping full drying time |
| Old coatings | Scrape loose paint, coarse sanding, seek professional advice for lead | Applying preservative over flaking paint; inadequate surface preparation |
| Repairing rot | Chisel to sound wood, treat exposed timber, use consolidant or replace board | Masking structural rot; using non-treated replacement timber |
| Fastenings | Use stainless or galvanised fixings; seal cut ends of new timbers | Mixed metals causing staining and corrosion |
| Sanding | 80–120 grit to key surface; remove dust before treatment; avoid over-sanding softwoods | Feathered edges, uneven finish, poor preservative adhesion |
Tools, materials and safety equipment for shed treatment
Preparing for a shed treatment means gathering the right kit, protective gear and information. A correct mix of brushes, sprayers and stirring tools speeds the job and improves penetration. Safety equipment and clear storage rules protect your household and garden wildlife.
Essential tools: brushes, sprayers, stirrers and PPE
Choose high-quality brushes matched to your product. Synthetic-bristle brushes suit water-based preservatives. Natural-bristle or manufacturer-specified brushes work best for solvent-based formulations. Use sash brushes for tight edges and larger filling brushes for broad panels.
Sprayers save time on large surfaces. Airless sprayers deliver fast, deep coverage but need skill to control. HVLP units reduce overspray and give a finer finish. Always back-brush after spraying to even out coverage and aid penetration.
Use long-handled stirrers and accurate measuring jugs for any dilution. Lay drop sheets and use masking tape to protect glass, fittings and nearby plants. Keep a bucket for tool cleaning separate for water-based and solvent-based systems.
PPE for wood treatment should be non-negotiable. Wear nitrile or chemical-resistant gloves, safety glasses or goggles, long sleeves and sturdy footwear. For respiratory protection choose an FFP2/FFP3 mask for dust or an organic vapour cartridge respirator when using solvent products.
Safe handling, storage and disposal of preservatives
Store all products in their original containers with labels intact. Keep them in a cool, dry place out of reach of children and pets. Follow any temperature limits shown on the label to avoid splitting or leaks.
Never pour leftover preservatives down drains or onto soil. Rinse tools into a collection container and allow solids to settle. Dispose of residues and empty containers at your local civic amenity site in line with safe storage wood preservatives guidance from your council.
Clean brushes and sprayers with water for water-based products. Use white spirit or mineral turps for solvent-based preservatives. Collect used solvents and contaminated rags for hazardous waste disposal rather than flushing them away.
Legal and environmental guidance for UK households
Follow COSHH (Control of Substances Hazardous to Health) principles when storing and using chemical preservatives at home. Read product labels and safety data sheets before use. Only buy and apply approved biocidal products that match the task.
Heed UK environmental guidance wood treatment such as HSE notes on biocidal products. Avoid working near watercourses and use drip trays to prevent run-off. Check local planning or conservation rules when treating timber near protected habitats.
| Item | Purpose | Best practice |
|---|---|---|
| Synthetic-bristle sash brush | Edges and precise application | Use with water-based preservatives; clean with water |
| Larger filler brush | Panels and flat surfaces | Select bristle type to match solvent or water base; back-brush after spraying |
| Airless sprayer / HVLP | Fast coverage and finish control | Practice on offcuts; wear respirator and cover surrounding plants |
| Stirrers and measuring jugs | Correct mixing and dilution | Follow label ratios; use separate tools for each product type |
| Nitrile or chemical-resistant gloves | Hand protection from preservatives | Replace if torn; avoid latex for solvent use |
| Respirator (FFP2/FFP3 or vapour cartridge) | Protect lungs from dust and vapours | Choose filter type to match product; check fit before work |
| Safety glasses / goggles | Protect eyes from splashes | Seal to face for solvent work; clean after use |
| Drop sheets and masking tape | Protect surrounding areas | Use heavy-duty sheets and secure edges to prevent overspray |
| Collection container for rinses | Prevent drain pollution | Allow solids to settle; dispose at civic amenity site |
Timing treatments: seasonal considerations in the United Kingdom
Choosing the best time to treat shed UK involves watching weather, timber condition and the product label. Aim for spells of dry, mild weather so the preservative can penetrate and cure. Spring and summer usually give the most reliable windows for seasonal wood preservation, while autumn can work if you pick a settled day.

Ideal weather conditions for applying preservative
Pick days with low wind and no rain forecast for the product’s surface-dry time. Most manufacturers recommend application between 5°C and 25°C. Avoid very hot sun that can cause uneven drying, and do not apply during freezing spells. Check the label for the exact temperature and drying guidance.
Frequency of retreatment based on exposure and product label
Follow the guidance on the container. Many exterior preservatives suggest inspection every year and retreatment intervals wood preservative of roughly three to five years for above-ground timber. Elements in ground contact or those facing prevailing winds often need more frequent attention.
If the preservative is overcoated with paint or stain, the next work may depend on the topcoat’s life rather than the preservative alone. Look for cracking, flaking or loss of adhesion as triggers to strip and recoat.
Signs that indicate it is time to re-treat your shed
Know the signs to re-treat timber so problems are caught early. Visible mould, mildew or algae regrowth are clear red flags. Flaking coatings, soft or spongy wood on touch, and insect bore holes need prompt action.
Other indicators include rapid darkening when wet, increased water absorption, split or checked boards and a persistent damp smell inside the shed. Corroded fixings that let water in are a cue to inspect surrounding timber and treat exposed areas.
Protecting shed fixtures and fittings when treating timber
Treating timber in a garden shed needs care to avoid damaging metalwork, glass and interior fittings. Take a few simple steps to protect near items, reduce cleanup and keep the structure performing well. Follow sensible protection and ventilation measures to prevent later problems with corrosion or trapped moisture.
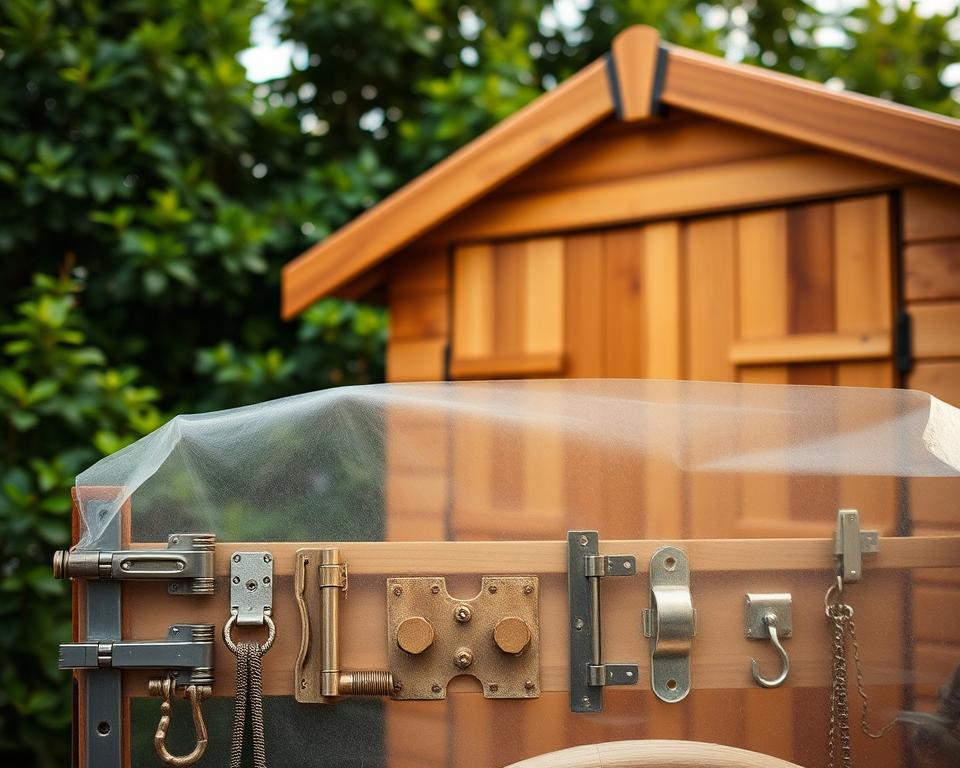
Remove removable items where you can. Hinges, handles, locks and window panes are best taken off and stored safely while you apply preservative. If removal is impractical, mask metal fittings wood preservative with painter’s tape and a sheet of polythene to keep surfaces clean and chemical-free.
Swapping corroded fixings for stainless steel or galvanised alternatives limits future staining and failure. Where metal must stay in place, apply a barrier coat such as a rust-inhibiting primer before treating nearby timber. Protect adjoining masonry, paving and plants with drop sheets to prevent overspray or drips.
Treat shed interior shelving with the same care as external boards. Remove free-standing shelves and coat both faces before refitting. For built-in shelving, expose as many surfaces as possible and allow full drying time before returning boxes or tools.
Floorboards deserve attention. If the floor is raised, treat the underside to reduce fungal spread. Where timber sits directly on soil, add ground clearance or place a concrete slab beneath the shed. This approach helps reduce rot and keeps stored items dry.
When you treat internal framing, choose low-odour, water-based products for enclosed spaces. These products reduce fumes and allow safer work in areas with limited airflow. Leave treated zones to cure fully before sealing or locking the shed.
Maintain ventilation to prevent moisture build-up after treatment. Keep existing vents clear and consider fitting air bricks or small louvre vents where condensation is an issue. Good ventilation to prevent moisture avoids mould and allows coatings to dry evenly.
Check the interior regularly while drying is underway. Look for leaks, blocked gutters or ponding that could reintroduce moisture. Prompt attention stops trapped damp from undermining the preservative and protects fittings from corrosion and decay.
Enhancing protection: paints, stains and waterproof coatings
Treating timber with a preservative is the first step. Choosing the right topcoat adds UV defence, colour and extra weatherproofing. Pick products that match the preservative type and the exposure your shed faces for long-lasting results.
When to overcoat preservative with paint or stain
Allow the preservative to dry and cure to the manufacturer’s timescale before overcoating. Water-based overcoats sit best on water-based preservatives. Oil-based paints need a suitable primed surface.
Use a quality exterior paint or a microporous stain to extend maintenance intervals and keep the timber looking good. Test a small area first to check compatibility and finish.
Comparing breathable finishes versus impermeable membranes
Breathable finishes timber with microporous formulations lets moisture vapour escape while shedding rain. This reduces the risk of trapped moisture that leads to rot, especially at cut ends and joints.
Impermeable varnishes or thick sealants can lock moisture into damp timber. Avoid impermeable membranes on timbers that may retain moisture or sit near the ground. For most garden buildings, breathable paints and stains are the safer choice.
Colour and aesthetic choices without compromising protection
Shed colours and protection go hand in hand. Lighter shades reflect heat and reduce surface checking. Darker tones look striking but can increase thermal stress on the wood.
Choose products with UV inhibitors and stable pigments to slow fading. Semi-transparent stains show grain but need more frequent upkeep than opaque paint. Mid-tones often balance appearance and durability.
For extra defence in exposed sites, combine a suitable preservative with an overcoat preservative paint rated for exterior use and top that with breathable finishes timber. If you need to prevent water ingress at vulnerable areas, use targeted waterproof coatings shed on plinths or base timbers while keeping cladding finishes vapour-permeable.
Common mistakes to avoid when applying wood preservative
Applying a preservative seems simple until things go wrong. A few frequent mistakes wood preservative users make shorten the life of a shed and waste product. Read the pointers below to avoid when treating shed timber and protect your investment.
Applying in unsuitable weather or on damp timber
Never coat damp or wet boards. Timber with high moisture content stops preservatives from penetrating. Rain, heavy dew or cold, damp days create wrong conditions preservative cannot overcome. Check the product leaflet for minimum temperature and wait for clear, dry weather.
Using incorrect dilution or insufficient coats
Follow manufacturer dilution ratios exactly. Over‑dilution reduces protection and under‑dilution can cause surface issues. Some brands, such as Cuprinol and Ronseal, are ready‑mixed and must not be thinned. Apply the recommended number of coats and ensure even wet film thickness. Record coverage rates so you have enough product for full, consistent application. Proper coats wood treatment mean fewer touch‑ups later.
Neglecting edges, cut ends and underside of shed components
Cut ends, grooved edges and undersides absorb preservative differently and are high‑risk points for rot. Always treat cut ends generously and seal them after fitting. Don’t ignore eaves, door bottoms and junctions where water collects. Treat cut ends timber on replacement boards before fitting to avoid undoing earlier work.
Small oversights create long‑term problems. Spotty coverage, wrong conditions preservative or missed edges will let decay start where you least expect it. Plan your work, check weather and stock enough product so you complete a full, even application and avoid these common mistakes wood preservative users make.
Conclusion
Treat the garden shed with wood preservative to protect investment and extend service life. In the UK climate, a timely application reduces the risk of rot, fungal attack and insect damage, delivering long-lasting shed timber care and lower repair costs over the years.
Prepare surfaces properly, select a preservative suited to your timber, and apply using the method recommended on the label. Use appropriate PPE, follow COSHH and HSE guidance, and dispose of waste through local council services. Regular inspection and re-treatment at manufacturer intervals will ensure effective shed protection UK.
When paired with breathable paints or stains, preservative-treated timber keeps structural integrity and improves appearance. For advanced decay or structural concerns, seek professional timber or joinery advice to confirm safe, compliant repair and ongoing maintenance.
FAQ
What does it mean “to treat the garden shed with wood preservative” and why is it necessary?
To treat the garden shed with wood preservative means applying a certified biocidal or fungicidal product to timber surfaces to prevent fungal decay, mould and insect attack. In the UK climate, driven rain, prolonged damp and seasonal temperature swings increase the risk of rot and wood-boring insects. Early treatment preserves structural integrity, extends service life, reduces replacement costs and helps keep fittings, doors and windows functioning correctly.
Which preservatives and UK brands are commonly available and suitable for garden sheds?
Common consumer brands sold in the UK include Cuprinol, Ronseal, Sadolin and Sikkens. These suppliers offer water-based and solvent-based formulations and specialist products for cut-end treatment or insect control. Choose an exterior-grade product labelled for above-ground or ground-contact use as required, and follow the manufacturer’s instructions for coverage and recoat intervals.
How should I prepare my shed before applying preservative?
Clear the shed and surrounding area, remove or mask fittings and glazing, and protect nearby plants and surfaces with sheeting. Inspect for rot, insect activity and loose coatings. Clean dirt, algae and mould with a suitable timber cleaner, then allow the wood to dry to below about 18–20% moisture content. Replace seriously damaged boards and reseal cut ends before treatment.
What application methods are best: brushing, spraying or dipping?
Brush application is ideal for edges, cut ends and precision work and helps work preservative into grain. Spraying is faster for large panels but must be back‑brushed to ensure penetration. Dip or immersion gives deepest penetration but is generally a factory or professional method for loose boards. A combination—brush cut ends, spray main faces, then back‑brush—is often most effective.
How many coats should I apply and how long should I wait before overcoating or using the shed?
Follow the product label, but many exterior preservatives advise at least one thorough coat to all surfaces and two coats where specified. Water-based products typically become surface-dry within 2–6 hours in good weather; solvent-based types can take 6–24+ hours. Full cure and deep penetration may take days to weeks, especially in cold or humid conditions. Only overcoat after the manufacturer’s recommended curing time.
Can I use a water-based preservative instead of a solvent-based one?
Yes—water-based preservatives usually have lower odour and VOCs, dry faster and are easier to clean up. They suit many exterior applications but check the label for ground-contact suitability and penetration performance. Solvent-based products can penetrate denser timbers more deeply and may offer longer-term protection in demanding exposures; they require more PPE and careful disposal.
What active ingredients should I look for and what do they protect against?
Active ingredients commonly include isothiazolinones, borates, copper-based compounds (such as copper naphthenate), IPBC and some synthetic insecticidal actives. Borates are effective against fungi and woodworm but are water‑soluble and need protection from direct weathering. Copper-based products give durable decay resistance outdoors. Check labels to confirm protection against fungi, woodworm and other pests.
How do I handle reclaimed timber or pressure-treated timber?
For pressure-treated timber, additional on-site treatment is usually unnecessary but always reseal cut ends with an end‑grain preservative. Reclaimed timber can be unpredictable—inspect for hidden rot, prior treatments and insect damage. Where unsure, seek specialist advice or testing. Do not mix incompatible products; follow manufacturer compatibility guidance when overcoating.
What are the best cleaning and repair practices before treatment?
Remove dirt and biofilm with a firm brush and a mild or specialist timber cleaner. Use sodium percarbonate-based cleaners or fungicidal washes for stubborn mould. Avoid high-pressure washing on thin cladding. Remove loose paint, cut back minor rot to sound wood, apply preservative to exposed areas and use consolidants or structural fillers only where appropriate. Replace badly damaged timbers.
What PPE and disposal steps should I follow when using preservatives?
Wear chemical-resistant gloves, eye protection, long sleeves and a suitable respirator (FFP2/FFP3 or organic vapour cartridge for solvents). Store products in original labelled containers, locked away and within recommended temperatures. Do not pour leftovers down drains; follow local council guidance for hazardous waste disposal. Clean water-based tools with water and solvent-based tools with white spirit, collecting rinse materials for proper disposal.
When is the best time of year to treat a shed in the UK?
Aim for dry, mild days with no rain forecast during the product’s surface-dry window. Spring and summer usually provide the most reliable conditions. Avoid very cold, frosty or very wet periods. In autumn and winter, work in extended dry spells and allow longer cure times. Optimal application temperatures are often between about 5°C and 25°C—check the product label.
How often should I re-treat my shed, and what signs show retreatment is needed?
Follow manufacturer guidance; many products suggest inspection annually and retreatment every 3–5 years for above-ground timbers, more often for exposed or ground-contact areas. Retreat sooner if you see mould, algae, soft or spongy timber, insect exit holes, flaking coatings, or rapid darkening on wetting. Pay special attention to cut ends, door bottoms and eaves.
How do I protect metal fittings and glass when applying preservative?
Where feasible remove hinges, handles, locks and glazing. If removal isn’t practical, mask metal and glass with painter’s tape and protective sheeting. Consider replacing corroded fixings with stainless steel or galvanised options. Apply barrier coats to metal where preservative contact could accelerate corrosion.
Should I overcoat preservative-treated wood with paint or stain, and which finish is best?
Many preservatives are designed to be a base coat and can be overcoated after the recommended cure time. Microporous, breathable paints or stains are usually best for exterior cladding because they let moisture vapour escape. Opaque paints give greater UV protection; semi‑transparent stains preserve wood grain but need more frequent maintenance. Match overcoat type to the preservative for compatibility.
What common mistakes should I avoid when treating a garden shed?
Avoid applying to damp or frozen timber, working in unsuitable weather, over‑diluting products or applying too few coats. Don’t neglect cut ends, undersides, joints and eaves—these are high‑risk areas. Also avoid trapping moisture with impermeable finishes on damp timber, and never ignore product compatibility or PPE and disposal instructions.
Can preservatives harm nearby plants, pets or watercourses?
Some preservatives contain biocidal actives that can harm wildlife or plants if misused. Protect borders and soil with sheeting, avoid application near watercourses and use drip trays to catch run‑off. Follow label environmental warnings and local regulations. For near‑water work consult specific product guidance and, if necessary, seek an environmentally designed product.
When should I call a professional rather than treating the shed myself?
Consult a professional if there is extensive structural rot, widespread insect infestation, lead‑based paint, or if you lack access to appropriate PPE and equipment. A qualified carpenter or timber specialist can assess load‑bearing elements, recommend pressure‑treatment or replacement strategies, and ensure compliance with health and safety requirements.

