Securing Sheds: Anchor Plastic/Metal to Base

This concise guide explains practical steps for securing garden shed structures, focusing on how to anchor a plastic shed or metal shed to a plastic shed basev. It is written for UK homeowners, tradespeople and retailers of recognised brands such as Keter, Lifetime and BillyOh. The aim is to reduce wind uplift, limit movement and protect against water ingress so your shed and base last longer.
The article covers a range of techniques, from plastic-to-plastic fixings to metal shed foundation fixings, and compares methods for different base types. It sets out clear, practical advice on tools, fastenings and safety so readers can complete a reliable installation that meets insurance and local requirements.
Use this shed anchoring guide UK as a starting point to choose the right anchor system for your situation. Correct plastic shed base anchoring reduces long‑term maintenance and helps prevent structural deformation, while proper metal shed foundation fixings guard against corrosion and movement.
Inhaltsverzeichnis
Key Takeaways
- Anchoring a shed significantly reduces wind uplift and movement.
- Plastic shed base anchoring needs different fixings to metal frames.
- Choose anchors that suit your base type: grid, concrete, paving or timber.
- Correct fixings help meet insurance and local requirements in the UK.
- Use corrosion‑resistant fasteners for metal shed foundation fixings.
Understanding Shed Anchoring: Why It Matters for Plastic and Metal Sheds
A secure shed starts with proper anchoring. For lightweight plastic models and thin‑gauge metal buildings, a lack of fixings raises shed safety risks that affect neighbours, contents and the structure itself. Simple measures reduce movement, prevent damage and protect householders from potential liability.
Risks of an Unanchored Shed
Wind uplift shed incidents are common in exposed gardens. Strong gusts can lift whole structures, causing fences to fail, roof sheets to fly and injury to occur. Repeated shifting stresses seams and door frames, leading to leaks and corrosion in metal units.
Inside the shed, shelving and stored tools suffer when the floor tilts or panels flex. Water ingress from warped joints creates damp and rot, ruining equipment and increasing repair costs. Insurers may refuse claims if negligence is proven after an unanchored shed causes third‑party damage.
Benefits of Proper Anchoring
Anchoring delivers clear shed anchoring benefits. Fixing at multiple points and using cross‑bracing greatly increases resistance to lateral and uplift forces. A properly anchored building keeps doors aligned, protects seals and extends the life of fixtures.
Security improves too. A bolted shed discourages theft and unauthorised removal. From an administrative view, following manufacturer instructions and keeping receipts helps satisfy insurers and shows due diligence when a claim involves an outbuilding.
Regulations, Insurance and Local Considerations in the United Kingdom
Most small garden buildings fall outside Building Regulations, yet planning rules still apply in some circumstances. UK shed regulations normally permit sheds within size limits and sited behind the principal elevation, though restrictions exist for conservation areas and listed properties. Check with your local planning authority when in doubt.
Insurance for garden sheds often requires reasonable security and, in some policies, specific anchoring to a permanent base. Homeowners should retain receipts for bases and fixings. Manufacturer guidance from brands such as BillyOh or recognised suppliers sold in the UK may state precise anchoring methods needed to keep warranties valid.
Finally, choose anchors that do not damage shared boundaries or a neighbour’s property. Talk to neighbours if your works affect party fences or shared walls to avoid disputes and ensure compliance with local expectations.
How To Anchor A Plastic Shed Or Metal Shed To A Plastic Shed Basev
A clear anchoring process overview helps you plan each step before you start. Inspect the plastic base and shed footprint, note the manufacturer’s recommended fixing points and check for any damage. If the grid sits on timber bearers or concrete pads, plan to anchor into that supporting substrate rather than relying on the thin plastic alone.
Overview of the Process
Begin by choosing the correct anchor type for the site. Options include through-bolts into timber bearers under the grid, screw-in ground anchors through base slats for softer ground, and chemical resin anchors into concrete pads beneath the plastic. For paved or concrete settings use expansion bolts or resin anchors adapted to the base.
Prepare the base so it is level and clean. Repair any cracked or distorted grid cells and install timber bearers or concrete pads where extra support is needed. Transfer shed hole positions to the plastic base accurately, pre-drill where required and use sealed washers to keep joints watertight. Torque fixings to the values recommended by the manufacturer and test for lateral and uplift resistance.
Tools and Materials Specific to Plastic Bases
Use a cordless drill fitted with the right bits: HSS for metal frames and masonry bits for concrete pads. Keep a spade or trowel handy to expose substructure and a rivet gun for some plastic fixings. Common consumables include galvanised or stainless-steel screws and bolts, nylon washers and sealed washers to prevent water ingress.
For concrete under the grid, carry chemical resin cartridges and appropriate dispensing nozzles. For soft ground, choose heavy-duty screw-in ground anchors in galvanised finish. Treated timber bearers cut to size, metal brackets or base plates and manufacturer-supplied fixing kits or heavy-duty plastic grid anchors complete the kit.
Common Pitfalls When Anchoring to Plastic Bases
Avoid assuming the plastic grid alone will bear anchor loads. Most plastic base fixings must reach the supporting substructure. Anchoring only into thin plastic risks failure under wind or uplift loads.
Do not over-tighten fasteners; this can crack plastic or strip threads. Use galvanised or stainless fixings on metal sheds to prevent rapid corrosion. Place anchors away from edges or joints to reduce the chance of split plastic and weak leverage.
Seal each penetration to stop water pooling. Untreated moisture can degrade timber bearers beneath the grid and cause frost damage in winter. If movement remains after initial fixing, add cross-bracing or extra anchors until the shed shows no lateral or uplift play.
| Step | Key Action | Preferred Fixing |
|---|---|---|
| Inspect base | Check grid integrity and locate supporting substructure | Visual inspection and probe with spade |
| Choose anchor | Select based on substructure and ground type | Through-bolts, screw-in anchors, chemical resin or expansion bolts |
| Prepare base | Level, clean and install bearers or pads where needed | Treated timber bearers, concrete pads |
| Mark & drill | Transfer shed holes, pre-drill and protect metal fixings | HSS/masonry bits, sealed washers, galvanised bolts |
| Fix & test | Tighten to torque spec, verify lateral and uplift resistance | Torque wrench, additional anchors if needed |
| Maintain | Inspect seals and fixings periodically | Replace corroded fixings, re-seal penetrations |
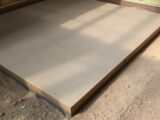
Types of Shed Bases and How They Affect Anchoring
Choosing the right base changes how you anchor a shed. Different shed base types demand distinct fixings and care. Below are practical notes on the three most common foundations and how they shape your anchoring choices.

Plastic grid systems and where to fix
Modular plastic grid bases from brands sold at Wickes and B&Q sit on compacted stone or soil and give good drainage. For secure plastic grid base fixings, locate the timber bearers or concrete pads beneath the grid cells before drilling.
Screw through the plastic into timber bearers with long stainless or galvanised screws and neoprene washers to stop water ingress. If a metal plate sits under the grid, use bolts through the plastic into the plate for better hold.
Plastic grids install quickly and tolerate uneven ground. Thin cell walls limit direct holding power, so always fix where a solid bearer or pad exists.
Concrete and paved surfaces: anchor selection
Concrete slabs and well‑bedded paving provide a permanent substrate that suits expansion bolts, sleeve anchors and resin anchors. For plastic bases over concrete, drill through the plastic and into the slab to install wedge anchors or resin‑bonded M10–M12 stainless studs.
Use washers and backing plates to spread load and reduce stress on thin plastic. Avoid fixing only into loose paving blocks; prioritise concrete subbases and concrete shed base anchors for long‑term performance.
Timber frame bases: best practice for wood and metal sheds
Timber bearers and joists made from treated tanalised timber give excellent screw and bolt purchase. Confirm timber shed base compatibility by checking the bearers are sound, elevated from ground moisture and fitted with damp‑proof measures.
When a plastic grid rests on a timber frame, anchor through the grid into the bearers using countersunk or capped washers. For metal sheds, fit through‑bolts with backing plates under the bearers so the thin metal shell does not tear.
| Base Type | Typical Fixing | Advantages | Limits |
|---|---|---|---|
| Plastic grid | Long stainless screws to timber; bolts to metal plates | Quick install; good drainage; forgiving on uneven ground | Thin plastic walls; needs bearer or pad beneath |
| Concrete / Paved | Wedge anchors; sleeve anchors; resin‑bonded studs | Strong, permanent fix; ideal for heavy sheds | Requires correct substrate; avoid loose paving blocks |
| Timber frame | Screws and bolts with backing plates | Excellent holding power; easy to replace rotten sections | Timber must be treated and dry; requires damp‑proofing |
Match your anchor type to the base and check for solid bearers or pads before fixing. Careful selection of plastic grid base fixings, concrete shed base anchors and attention to timber shed base compatibility reduces movement and prolongs the life of both plastic and metal sheds.
Anchor Options for Plastic Sheds
Choosing the right anchors keeps a plastic shed secure in changeable UK weather. Lightweight panels need different fixings from heavier, fixed bases. Below are practical options that suit common bases and soil types.

Plastic-to-plastic fixings work well for small garden buildings when used with reinforcement. Purpose-made plastic rivets or screws with large neoprene washers spread load and cut the risk of cracks. For greater strength, fit stainless or galvanised plate washers over panel faces to increase pull-out resistance.
Internal strengthening helps where panel walls are thin. Timber battens or plywood pads fixed inside the shed accept bolts and distribute forces across a wider area. Many manufacturers supply bolt-through kits that clamp panels with metal plates to avoid distortion at the fixing points.
Screw-in ground anchors make good sense for light structures. Helical anchors in galvanised steel can be installed beside the base or through it, then tied to the frame with straps or brackets. Use multiple anchors at corners and midpoints for larger sheds to resist uplift and wind load.
Drive-in or auger anchors suit compacted soil. Choose anchors rated for uplift and fit corrosion-resistant connectors. Leave strap lengths generous to avoid concentrating stress on the plastic base or panel seams.
Where a plastic base sits on concrete, mechanical or chemical fixing gives a secure result. For solid support, use resin anchors for shed base installations: drill to the correct diameter, clean the hole, inject resin from reputable brands such as Fischer or Rawlplug, then insert stainless threaded rods and allow cure time.
Expansion bolts form a faster option for concrete substrates. Sleeve or wedge anchors with neoprene washers seal the hole against water ingress. Tighten to the correct torque and use stainless or hot-dip galvanised fittings rated for outdoor use.
| Anchor Type | Best Use | Corrosion Resistance | Typical Fixing Points |
|---|---|---|---|
| Plastic rivets / screws with neoprene washers | Small plastic panels where minimal load applies | Low; washers protect plastic from damage | Panel overlaps, door frames |
| Reinforcement plates / bolt-through kits | Medium sheds needing improved pull-out resistance | High for stainless or galvanised plates | Panel faces, internal batten locations |
| Screw-in (helical) ground anchors | Light to medium sheds on soil | High when galvanised | Corners, side midpoints |
| Drive-in / auger anchors | Compacted or firm soil conditions | Medium to high with galvanised finish | Corners and perimeter |
| Resin anchors for shed base | Plastic base over concrete for maximum pull-out resistance | High with stainless threaded rods | Through-plastic into concrete |
| Expansion bolts (sleeve / wedge) | Concrete or paved bases needing quick install | High if stainless or galvanised | Fixed base edges and frame feet |
Anchor Options for Metal Sheds
Metal sheds demand robust fixing methods to resist wind and movement. This short guide covers practical choices for securing frames to bases and the ground, with attention to durability and corrosion protection.

Bolting and through‑fixing
Where a shed sits on a concrete pad or timber bearer, the best approach is to bolt through metal shed frames into the substrate. Use backing plates or large washers under the base to spread load and prevent pull‑through on thin sheet steel. For pre‑punched frame holes, fit the recommended M6–M8 bolts with rubber or nylon washers to keep a weather seal and reduce vibration.
Self‑tapping tek screws can work where access beneath the frame is limited, but they offer less resistance to uplift than through‑bolts. For secure joints use a minimum of four fixings on medium‑sized sheds and position them at key frame points to control racking.
Heavy‑duty ground anchors
In soft ground, choose screw‑in earth anchors rated for lateral and uplift loads. Brands such as Fischer or independent helical anchors are proven performers for temporary and semi‑permanent installs. For mixed or poor soils, concrete‑in anchors or driven steel anchors give long‑term reliability.
Link anchors to the frame with galvanised straps or stainless bolts and check the rated load. Using multiple ground anchors per corner improves holding power and reduces stress on any single point.
Corrosion protection and fastener selection
Pick stainless fasteners for sheds where coastal exposure or moisture is a concern. A2 stainless is suitable for most inland sites; A4 is better by the sea. Hot‑dip galvanised bolts and anchors work well for general use but avoid mating dissimilar metals directly.
Use plastic washers or isolation pads where aluminium panels meet steel fixings to prevent galvanic reaction. For chemical resin anchors set into concrete, specify stainless steel rods. For timber attachments choose galvanised coach screws with appropriate coatings to prolong life.
- Use backing plates with any bolt through metal shed installation.
- Fit at least four secure ground anchors for medium sheds.
- Choose stainless fasteners for sheds in coastal or damp locations.
- Select screw‑in or concrete anchors to match soil and load conditions.
Step-by-Step Guide: Anchoring to a Plastic Shed Base
This walkthrough covers practical actions for step by step anchoring shed projects on plastic grid bases. Read each short paragraph before starting work to avoid common mistakes and to make sure you follow a safe, effective process.

Preparing the Site and Base Inspection
Begin by checking the base is level and matches the shed footprint. Look for cracking, distortion or any rot in timber bearers. Small issues can grow into big problems if ignored.
Clear debris from under plastic grids and inspect the infill. Ensure the aggregate is compacted so the substrate will not sink later. If you find soft spots, remove and recompact the material or add sharp sand and compact firmly.
Locate or fit treated timber bearers or concrete pads under the planned fixing points. Confirm bearers are level and set where the shed floor will sit. Check door orientation and clearance before you commit to anchors.
Marking, Drilling and Fixing into a Plastic Base
Sit the shed in place and mark fixing holes through the floor or base flange into the plastic grid. Use a centre punch or marker to stop the drill wandering during drilling plastic base operations.
If you are fixing into timber bearers, pre‑drill clearance holes through the plastic and timber. Use long stainless or galvanised wood screws with large neoprene washers. Countersink or fit cap heads to avoid snagging and to keep the finish neat.
When concrete lies under the plastic, drill through the plastic into the concrete with a masonry bit. Blow out dust, then fit resin bolts or expansion anchors sized M10–M12 for medium sheds. Fit washers and tighten to manufacturer torque.
For metal frames, bolt through the frame into the backing plate inside the shed and secure with nuts and washers. Seal every penetration with an outdoor silicone sealant to stop water ingress and reduce corrosion risk.
Testing Stability and Making Adjustments
Test the structure by applying pressure to corners and sides and note any movement. Check for looseness after the initial torque settling, then re‑check fixings after 24 hours to allow anchors to bed in.
If movement persists, add cross‑bracing, extra anchors or larger washers and backing plates to spread loads. Re‑inspect seals and touch up any exposed metal with suitable primer to protect against corrosion and to aid in securing shed stability.
Tools, Materials and Safety Considerations
Before you start fixing a shed, gather the right kit and review safety steps. Choosing correct tools for anchoring shed and picking suitable fastener sizes for shed helps the job go smoothly. Good preparation cuts the risk of damage to the base and ensures shed installation safety for everyone on site.

- Cordless drill or impact driver with masonry, wood and metal bits for versatile drilling.
- Spade, trowel and a breaker bar to access substructure beneath plastic grid bases.
- Socket set and torque driver for tightening bolts and expansion anchors to the correct torque.
- Rivet gun for blind rivets, plus a spirit level, measuring tape, centre punch and marker for accurate layout.
- Wire brush, compressed air or a hand pump to clean holes before inserting resin anchors.
Recommended materials and fastener sizes
Use stainless steel or hot-dip galvanised bolts and screws to resist corrosion. Typical fastener sizes for shed include M6–M8 for sheet metal through-fixings and M10–M12 for concrete anchors or through-bolts into timber bearers. Neoprene washers help seal penetrations and spread load.
| Application | Fastener Type | Typical Size |
|---|---|---|
| Sheet metal frame | Stainless steel through-bolt or self-drilling screw | M6–M8 |
| Concrete beneath plastic grid | Resin anchor (Hilti, Fischer, Rawlplug) | M10–M12 |
| Timber bearers | Through-bolt with backing plate | M10–M12 |
| Soft ground anchoring | Galvanised screw-in ground anchor | Length and helix per soil type |
Back plates or wide washers (50–100mm) prevent pull-through on thin materials. Select resin anchor systems with cure times and temperature ranges suited to UK weather to ensure dependable performance.
Safety PPE and best practices for DIY installations
- Wear safety goggles, ear protection when drilling masonry, gloves and a dust mask when cutting or drilling.
- Use steel-toe boots for handling heavy bases and practise safe manual handling with at least two people for large lifts.
- Follow COSHH guidance when using resin anchors and keep adhesives away from children and pets.
- Use RCD-protected circuits for outdoor power tools and avoid drilling near buried services; contact the local utility locator if uncertain.
- Pre-drill pilot holes, match drill speeds to material and keep the shed supported to reduce slips that can harm the base or installer.
Maintaining the correct balance between the right tools for anchoring shed and strict attention to PPE for DIY garden projects reduces accidents. Observing shed installation safety from start to finish protects people and preserves the integrity of the build.
Maintenance, Troubleshooting and Long-Term Care
Regular care protects your shed against the worst of British weather. A planned routine makes shed maintenance manageable and helps spot issues before they worsen. Follow a simple shed inspection schedule and log findings after storms or any ground movement.
Regular Inspection Schedule
Inspect fixings and the base every six months and after severe weather. Check for loose nuts, split plastic, rot in timber bearers and pooling water. Look for corrosion on metal fasteners and for door misalignment. Clear leaves and debris around the base to improve drainage and reduce damp.
Addressing Movement, Loosening or Corrosion
Tighten bolts to the manufacturer’s recommended torque. Replace corroded fasteners with stainless steel equivalents to limit future fixing corrosion. For timber loosening, use epoxy‑injected consolidants or replace damaged bearers. Add backing plates or longer coach screws where needed.
Plastic base cracks are best handled by replacing damaged grid sections or adding timber or concrete pads to create a solid fixing point. For metal frame corrosion, wire‑brush back to bright metal, apply a rust converter, prime and repaint with a suitable metal paint. Replace any components that are badly weakened.
When to Re-anchor or Upgrade Fixings
Consider the need to reanchor shed if several fixings show wear, the shed has been moved, or the ground has heaved. Upgrade to larger anchors or add anchor points for bigger sheds or exposed sites prone to gales.
For long‑term stability of high‑value or frequently used sheds, convert to a permanent concrete base with resin anchors. Keep a record of all interventions to simplify future shed troubleshooting and to plan timely upgrades.
Conclusion
This securing sheds conclusion pulls together the practical steps and safety points needed when fixing plastic or metal sheds to a plastic shed base. Start by understanding the substructure beneath plastic grid panels—timber bearers or a concrete pad offer the most reliable anchor points. Where possible, anchor into that solid substrate rather than relying solely on the plastic grid itself.
Choose anchors that match the base: screw‑in ground anchors for soft ground, resin or expansion anchors for concrete, and through‑bolts for timber bearers. Use corrosion‑resistant fixings such as stainless steel or galvanised bolts and consider backing plates to spread loads. Proper sealing and regular checks reduce movement and prolong lifespan. This anchor shed summary underlines that correct materials and techniques are as important as the anchor type.
Observe manufacturer guidance and local regulations, and keep records of materials and work for insurance purposes. If the base is complex or the shed is large, engage a competent tradesperson. As a final step, assess your existing installation, plan an inspection, and apply plastic shed base best practice from this article to ensure a safe, durable result.
FAQ
Why is anchoring a plastic or metal shed to a plastic grid base important?
Anchoring prevents wind uplift and lateral movement that can deform panels, damage doors and allow water ingress. Proper fixings increase longevity, improve security and help meet insurer and manufacturer requirements from brands such as Keter, BillyOh and Garden Buildings Direct. Anchoring to a solid substrate beneath the plastic grid (timber bearers or concrete pads) is usually necessary rather than relying on the thin plastic alone.
Can I fix my shed directly through the plastic grid base into the ground?
Not usually. Most plastic grid systems are not load‑bearing by themselves and need a supporting substructure. Screw‑in ground anchors can be used through or beside the grid if they reach competent soil, but for reliable uplift resistance you should fasten into timber bearers or concrete pads under the grid, or use resin anchors into concrete where available.
What types of anchors work best for plastic sheds?
For plastic sheds, use purpose‑made plastic rivets with large neoprene washers, galvanised screw‑in ground anchors for soft soil, or resin/expansion anchors when fixing through the grid into concrete. Reinforcement plates, timber battens or manufacturer bolt‑through kits increase pull‑out resistance and reduce the risk of cracking the plastic.
What anchors and fasteners are recommended for metal sheds?
Metal sheds typically require through‑bolts into timber bearers or concrete using M10–M12 stainless or hot‑dip galvanised anchors. Use backing plates or wide washers to spread loads, and consider galvanised screw‑in earth anchors for soft ground. Use A2/A4 stainless steel near the coast to avoid corrosion and galvanic reactions.
How do I adapt anchors when the plastic base sits over paving or concrete?
Drill through the plastic and into the concrete, then install resin‑bonded M10–M12 threaded rods or mechanical expansion anchors (wedge/sleeve). Clean holes thoroughly, follow resin manufacturer cure times (Fischer, Rawlplug, Hilti) and seal penetrations with outdoor silicone to prevent water ingress.
Which tools and PPE do I need to anchor a shed to a plastic base?
Essential tools include a cordless drill with masonry, wood and metal bits, socket set/torque driver, spade or trowel to access substructure, rivet gun if needed, and a spirit level. PPE: safety goggles, ear protection, gloves, dust mask when drilling, and steel‑toe boots for heavy lifts. Use RCD protection for power tools outdoors.
How do I mark and drill fixing points without damaging the plastic base?
Sit the shed in position and transfer hole positions carefully using a marker or centre punch to prevent drill wander. Pre‑drill pilot holes and use long stainless/g galvanised screws into timber bearers or the correct masonry bit for concrete. Use neoprene washers and backplates to distribute load and avoid over‑tightening, which can crack plastic.
How often should I inspect the shed fixings and base?
Inspect fixings, seals and the base every six months and after severe weather. Check for loose nuts, split plastic, rot in timber bearers, corrosion on fasteners and changes in door alignment. Re‑tighten or replace corroded fasteners, repair damaged timber or replace cracked grid sections as required.
What should I do if anchors loosen or timber bearers rot?
Replace corroded or stripped fasteners with stainless equivalents. Repair rotten timber by replacing bearers or using epoxy wood consolidants for minor decay. Add larger backing plates or longer coach screws if pull‑out persists. For damaged plastic grid cells, fit new sections and provide timber or concrete pads for fresh fixing points.
Are there planning or insurance considerations when anchoring a garden shed in the UK?
Most small sheds do not need planning permission if they meet siting and size rules, but check the local planning authority for exceptions in conservation areas or listed properties. Insurers often expect reasonable steps to secure outbuildings; follow manufacturer guidance (Keter, BillyOh, etc.) and keep receipts for materials and work to support any claim.
Can I use mild steel fixings on a metal shed to a plastic base?
No. Mild steel will corrode quickly. Use galvanised or stainless steel fasteners and isolate dissimilar metals with plastic washers or coatings to prevent galvanic corrosion, especially where aluminium panels meet steel fixings.
When is it worth upgrading to a concrete base and resin anchors?
Upgrade to a concrete base if the shed is large, houses valuable equipment or is in an exposed location with frequent gales. Concrete with resin anchors provides superior long‑term stability and is recommended when multiple refixings have failed or for heavy metal sheds where uplift and lateral loads are high.
How many anchors should I fit to stop a shed from moving?
Use at least four anchors—one at each corner—for small to medium sheds. Larger sheds benefit from additional anchors at mid‑points along long sides and cross‑bracing. For ground anchors, spread them and use multiple straps to distribute uplift loads effectively.
Are manufacturer fixing kits worth buying?
Yes. Manufacturer kits are designed to work with specific shed geometries and include appropriate plates, bolts and washers to avoid panel distortion. They often simplify installation and help preserve warranties from brands such as Keter and BillyOh.
What common mistakes should I avoid when anchoring to a plastic grid base?
Common errors include relying on the plastic grid as the sole load‑bearing substrate, over‑tightening fixings, placing anchors too close to cell edges, using non‑corrosion‑resistant fasteners, and failing to seal penetrations—each can lead to cracked plastic, poor holding power or water damage to substructure timber.